Monday, 7 October 2013

Hand Made Holidays - with a guest


I was planning on starting my Handmade holidays series this week, but last night, I simply ran out of time to get my first project finished up (darn drying time).  This morning, I open my email to find a lovely project all laid out for me by my dear sister.  She even wrote it for me...so, Handmade Holidays starts today after all.  Thank you, A.

Story stones:


Find flat stones in various shapes and sizes.  Soak in warm soapy water to clean, rinse, let dry.
Decide what image to paint on each, using the stone's shape for inspiration and selecting a variety of images that can be commonly used in a child's story

Supplies:
Pencil, Acrylic paints, paintbrushes, water, mixing palette, toothpicks (for very fine details), fine tip permanent marker (for outlines). This pack of acrylic paint tubes is from Dollarama and was perfect. Saved us buying a ton of bottles just for this little project.


Draw outline of image with a pencil

Paint the images and outline with marker


Next we'll make a carrying pouch from some old denim and a ribbon to tie it up.

Now from me:  I love the little bird the best, personally - and the balloon.  I happen to know who this gift is intended for, and I think so many of the little images are just perfect for that individual.  That's the beauty of this project...you can customize it for anyone on your list...and you can add to it if they discover something is missing as they play.  So perfect.

So, what are you working on for the holidays?

Linking up with: Keep Calm Craft On over at Frontier Dreams
                        Creative Friday on Natural Suburbia 

Thursday, 3 October 2013

Back to knitting after a long long break

My new hat.  I finished it last night, just in time to wear it this morning.  It fits over my big hair clip perfectly. 
This is my first knitting project since about March of last year.  I was giving my poor hands a break.  When I was ready to cast on, I was going through my yarn basket and my hand touched the absolutely softest yarn I have ever felt.  It was coiled up, not in a ball, and I couldn't remember buying it.  Had no idea where it was from...and then it dawned on me...I spun it myself (woot woot) from the most delightful fiber from Andrea at Wonder Why Alpaca Farm ...maybe a year and a half ago.
 
It's soft, and luscious and if you look closely, there are just the tiniest flecks of pink and green in it.  The emerald green is the very last bit left over from N's "blue eyes" hat.  Incidentally, N saw me taking the first picture and was all "what are you doing with my new hat"?!?  Ha ha, that boy sure loves his alpaca.  I have promised S a new hat next (you know, being all grown up and in high school and all, he needs a PLAIN hat), and then I will spin my newest alpaca fiber to make N a new hat since he wants one so badly.

And, of course it's hard to let a post go by without a pottery picture so here you go:  to celebrate fall...of course by the time it is finished (it is taking forever to dry), we will be into winter.  Oh well...it will still be lovely.

Linking up with: Fiber Arts Friday at Wisdom Begins in Wonder
                         Creative Friday at Natural Suburbia

Monday, 30 September 2013

A request for a few moments of your time

Help support children's literacy with a moment of your time.

Just thought I would put this out there...We are trying to get some much needed new books for our school library.  If you have a spare moment, would you please consider going to the Indigo "adopt a school"  site and "adopting" our school - it's free, but each 50 adopters gives us one free book for our school library. Enter Hanna Memorial, Ontario in the search.

And, if you happen to have $12.00 to spare, each $12.00 donation on that site also gives us one new book.

Thank you in advance for your time.

Tuesday, 24 September 2013

A new venture

For those of you who come looking for me every once in a while, I may be posting more sporadically than normal in the next couple of weeks.  I am in the process of setting up a blog...and writing it...for an artists' collective I am a part of.

If you are curious,
or interested,
or related to me (*wink*),
you can find it over here.

Hopefully, though, you won't even notice a difference.

Monday, 23 September 2013

Tissue box upcycling part 2, and some recipe links

I promised you more ideas for those wonderful tissue boxes, so here is part two:  price tags.
 I happen to have this handy dandy Fiskers circle cutter, but tracing a small cup and cutting it out works just fine too.  I cut a variety of sizes because a small tag looks ridiculous on a big piece, and a big tag looks ridiculous on a small piece.
 
 I also (by eye) cut some strips from the side panels of the boxes, and then trimmed off the corners.
Punch a hole, and voila!  Custom made price tags for your lovely hand crafted items.  The store I have my pottery in right now has a big focus on eco-friendly packaging, so I thought these would fit the bill.  They are big enough that I can write a little description or care instructions if I need to.
AKA: gift tags too, if you need to label a whole bunch of things.  I actually like to make a whole bunch of these at once and then keep them in a bowl for adding a tag to just about anything.
I tie them on with yarn or twine.

As always lately, there is pottery drying and awaiting transport to the kiln.

And since it was nice and chilly this weekend, I took the opportunity to test out a few recipes:
 This Amish Coleslaw  that I found at The Sanctuary Homestead.  Thank you Kristine.  I imagine you are supposed to wait a while before you eat it, like pickles, but we cracked one open the same day and it is quite tasty.  Crunchier than I was expecting.  3 out of 4 of us enjoyed it a lot... surprisingly, N (who loves coleslaw normally) would not eat it, but S, who usually only eats it if he HAS to, gobbled it right up.
 And these Chocolate chip zucchini, coconut cookies from Practical Stewardship were a big hit.  They were meant to be for snacks before cross country training, but everyone snuck some in their lunch today.  I guess that means they like them.

Linking up with: Frugal by Choice, Cheap by Necessity for Homemade Monday
                         Keep Calm Craft On over at Frontier Dreams

Wednesday, 18 September 2013

From the recycle bin - a pennant garland

We had our open house over at N's school last night, and I was looking for something to add interest to the "we are trying to get volunteers" table, so on my lunch break at work yesterday I came up with this little number. 
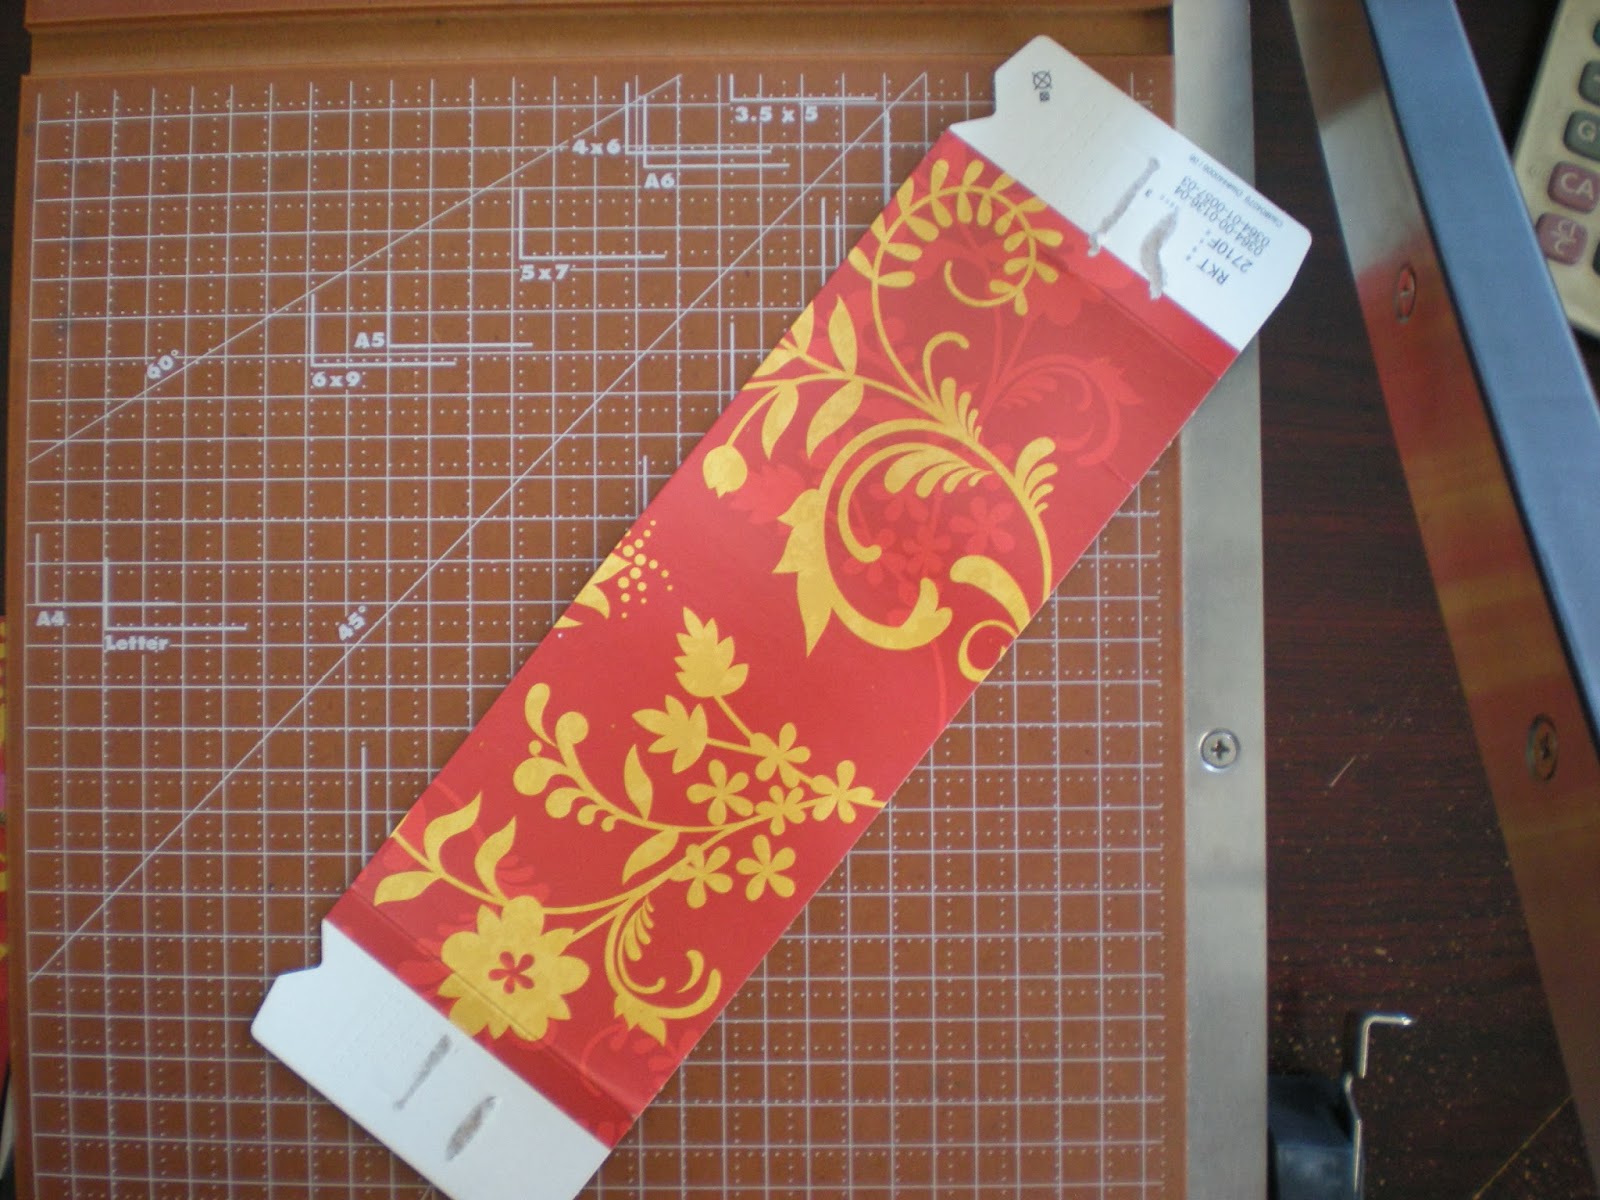
It is made of tissue boxes, and was easy peasy.  Here's the how to for new crafters:
And yes, if you are wondering, I DO choose my tissue boxes based on the patterns.
 
 
Open up the tissue box along the glued seam.

Using a paper cutter, or a pair of scissors, separate the patterned panels from those with print.

For this project, I only used the side panels.  Keep the smaller bits though - they can be used for other projects later (like these gift tags - you need to scroll down a bit).

I cut each piece to the same length (4 1/4") but I wasn't too worried about the width (tissue boxes are not standard, I have found).  I figured that would just add to the "home-made charm".

To cut the triangles, I just centered the bottom on the edge of the blade.
and then slid it over to do the other side.
NOTE:  If this project is being done by children, I recommend using scissors instead.


I hot glued along the top of the back, and tucked it up under one edge of a long piece of seam binding.
I glued all of the backs first, 

and then flipped the whole thing over to glue the front down as well.

I'm pretty sure a sewing machine could go through the cardboard as well, but hot glue is what I could fit in my purse :)

This is half of it, as we were setting up...

It's a nice, quick, easy project if you need a last minute decoration for an event that sneaks up on you.
Go ahead, start saving those tissue boxes.  You will start seeing so many ways to use them.

Linking up with: Transformation Thursday at the Shabby Creek Cottage
                         Creative Friday at Natural Suburbia
                         Craft Frenzy Friday at Obsessive and Creative
                         Homemade Monday at Frugal by Choice, Cheap by Necessity 

Monday, 9 September 2013

Shop Update - the gift tags are listed

 The quilt block ornaments / gift tags are finally listed over in my Etsy shop.   

 Each piece is hand stamped, hand cut, and trimmed before firing.  They are unglazed to show the texture more, and are all traditional quilt block patterns.
 They will make lovely ornaments...

 ...and really dress up a package.
Supplies are limited...there won't be another batch in time for Christmas.

Wednesday, 4 September 2013

A pottery update

I realize it has been quite a while since I posted any pottery related goodness.  This week (tomorrow in fact) marks the return to the studio.  While I'm waiting, I have been playing around with a few ideas this week:

 A new pitcher style I am trying.  I think this time around I'm going to focus on hand building.

 A couple of lanterns in various stages of drying...playing with pattern.

Playing with texture...I can't wait to see this one come out of the kiln (unless I ruin it).

And testing out a few ideas with tiny pieces, all packed with "fluff" to help them survive the trip across town.

I tend to post individual pieces on my facebook page as I work on them, rather than here, so if you just want to see the odd picture here and there,  feel free to "like me" over  here.  I would enjoy a few more "likes".

Linking up with:  Creative Friday over at Natural Suburbia
 

Tuesday, 3 September 2013

What I learned processing home grown fruit

This is the first year that I have had enough fruit in my own garden to process.  I learned a couple of things.
When you leave for work in the morning and there are 3 peaches on the ground, and you come home to find 100 peaches on the ground, it is time to pick them all...even if they aren't ripe.  I considered trying to salvage the fallen peaches too, but they were too bad to be salvaged.

I still managed to get about 20-25 pounds (our estimate - I forgot to weigh them).  I learned that the boiling water trick to remove the skins does not work with under-ripe peaches.  I learned that it takes a whole lot longer to peel a basket of tiny peaches from the garden that have bug bites than a basket of perfect peaches from the market.  I learned, belatedly, that I should have trimmed off the bottom branches of my peach tree as the fruit is too shaded to get very big - it's marked on the calender for next spring.  And I learned that 2 1/2 hours of peeling does not result in very many peaches at all.  I had planned to can them, but ended up freezing them in portions that will be just right for with waffles this winter.  I just couldn't add the amount of sugar that was required for canning.  I. couldn't. do. it.
 12.5 pounds of grapes that I picked from my friend's driveway.  If they were my own grapes, I would have made juice with half and jam with half, but the deal was - I would pick her grapes, make jam, and then split the jars between us.
I questioned the part of the recipe that called for peeling 8 cups of grapes, and reserving the skins to add back in.  I'm glad I followed that part of the recipe.  I followed the whole recipe.  From a cookbook.  Because it would be tested.  It failed - miserably.  I ended up with 14 pint jars of grape sauce/syrup.  I re-opened all the jars, poured them into 2 big pots, added pectin (of which there was none in the original recipe) and reprocessed them.  Now I have 14 jars of very thin jam, bordering on sauce.  I questioned the part that said to add 2 cups of water to the 3 cups of sieved fruit (per batch) but did it anyways.  Next time I won't (the joy of cooking says add up to 1/2 cup, if necessary).  I learned that grape seeds really jam up the food mill, so I will try to find something better for next year, however, I also learned that boys really love to peel (squish) grapes, so I will remember that for next year.

I processed some apples too, and learned that my new apple corer doesn't work nearly as well as my mom's old apple corer.  Darn "new and improved" design.  Its just different enough to be useless.  I learned that, like the peaches, the tiny little apples don't go far once you remove the "weird" bits.  I was trying to make a couple jars of apple pie filling but ended up with just one, because once the boys saw the bowl of apple chunks, they wanted apple crisp for dessert (and S actually stepped up to make it), and because I gave up with a third or so of the batch left to peel.  Arthritis is not my friend.
And last but not least, I learned that there is a reason I label everything.  I label the spices, but apparently, someone else in my house does not.  A jar of unlabeled spice that I took to be paprika (because there wasn't one labelled paprika) was actually cayenne pepper (of which we have 2 jars???).  Add that to the fact that little tiny jalapenos are stronger than great big jalapenos and you end up with 10 quarts of salsa that is borderline too spicy to eat.  I did correct one mistake between batches though, and used the plump juicy tomatoes for tomato juice and bought more plum tomatoes for the salsa to save an hour and a half or so of simmering time.  And by the way, juicy tomatoes just have to be roughly chopped for salsa, but plum tomatoes stay in great big chucks if they are roughly chopped.  Another item to note on the recipe for next year.

The biggest lesson I learned:  although I consider myself quite old-fashioned and about the most "could-make-it-as-a-pioneer" person I know in real life (I'm not counting my internet friends), I would fail miserably if I had to support our family on the food that I could put up.  The weekend of canning just about did me in.  I can't imagine having to put up a whole winter's worth of food.  It's not all bad, though.  So far, I have managed to put up a year's worth of dill pickles, sweet pickles, hot peppers, salsa, tomato juice, half a year's worth of jam (with fruit in the freezer waiting for me), and dried all the herbs we should need and a few extra bits here and there. I'm not giving up yet though...I have cancelled my weekend plans and hope to stay home to do round 2 this weekend.

Linking up with: Wildcrafting Wednesday at Mind Body and Sole
                         Homemade Monday at Frugal by Choice, Cheap by Necessity
                         The Backyard Farming Connection - Hop 

Thursday, 29 August 2013

16 Tips that helped my booth look great

I am back, and unpacked from my craft show/pioneer festival last weekend.  I thought I would share with you my tips for what worked best, and also so I can look back on this next year to refresh my memory.

Let me start off by saying that one of the rules for this show was that all tents, tablecloths, chairs etc had to be neutral and of the period (no plastic, no bright colours).
Tip # 1:  Read the rules, and follow them.  It goes a long way to establishing good will between the organizers and the vendors.
Tip #2:  add some bunting, flags, something to the outside of the tent that will move in the breeze and catch the eye of passers-by with the motion.
 Tip #3:  Bring flowers or a plant.  This actually drew a lot of people directly to my tent - only 3 vendors had them, that I saw.  Also, weather permitting, set up a piece of your display outside the tent...also attracts attention.
 Tip #4: Set up at least part of the display the way it would be used.  It takes a bit more space, but if you have it, use it!
 Tip #5:  Take a bit of time to prepare some options for your items.  I wrapped a few packages to diplay gift tags, and I also had a handful hanging from evergreen branches in a vase (to suggest a Christmas tree).  This is the first time I displayed them like this, and it definitely helped sell them.
 Tip # 6:  Show more than one way to use an item, if possible...
 ...and if you can't show it, explain it.  I had this one displayed as a sewing notions bowl, but explained that it could also be used for olives with toothpicks (for instance - thanks A).
 Tip # 7:  Group like items and levels, levels, levels.  People will browse much longer if there eye keeps moving.  Items laid out flat on a table can be glanced at too quickly.
 Tip # 8:  Group like colours or styles together.  I noticed people gravitated automatically to the colour that caught their interest.  It makes more impact than having them all mixed in together.
Tip # 9:  Keep your pieces in mind when working on your backgrounds.  I tried to keep browns behind light pieces, and whites behind dark pieces.  It makes them pop.
 Tip # 10: Use props that are appropriate to the show.  Think outside the box.  I had plenty of people stop to chat about the antiques I was using as props.  Even if they don't buy anything, it keeps people in your booth longer and draws more people to see "what's so interesting over there".
 Tip # 11: Consider having a "Special Feature" that is just for that one show.  I featured mugs for this show, as they were serving tea across from me.  My next show is at a school, so I will feature something more geared to children.
 Tip # 12:  Have a place for people to rest, if the show requires much walking.  Elderly people appreciate this, and it allows their companions to browse while they rest.  Also, the fans!  It was HOT!  It was sunny.  I had fans available for people to take with them to enjoy the show, and then return them on their way out (I was by the entrance/exit).  They appreciated the fan, and it brought them back to my booth a second time.

Lucky # 13: (that was my booth) - Have one or two items displayed in a gift box.  I sold every item that had a turn in "the box".  Coincidence?  Not sure...it's the first time I tried it.  I will do it again.
 Tip # 14:  Find some way to divide your booth from the next.  My tent happens to have zippered screens that I can shut all the way, but from inside my tent you could see the back of the display pieces in the next booth (where they were hiding their Tim's cups and other garbage).  I put up several garlands and it kind of fooled your eye into stopping at the wall.
Tip # 15:  Participate fully!  If costumes are part of the show, wear a costume.  Support and visit other vendors.  Purchase your snack from a vendor on site instead of having someone bring you one from Timmy's.  It's all part of being a participating member of the show.
Tip # 16:  If at all possible, demonstrate your craft in the down times.  Obviously this won't work for everyone, but if you knit, embroider, crochet, sew, sculpt you can find a way to do it.  We had a canoe builder demonstrating his skills, as well as a blacksmith working on his forge, a weaver, a spinner...it's all part of the "show".

I had a lot of positive feedback from my booth, as did the show organizer.  The extra effort pays off both in sales and for future shows (next year, I get to pick my spot as my booth was highly talked about - how's that for making you feel the effort was worth it).   Good luck to you all with your next show.