Showing posts with label from my stash. Show all posts

Monday, 3 March 2014

A fun little sewing project.

This little number has been on my "Inspiration for the school art show" Pinterest board for years, but I hadn't gotten around to making it yet because I didn't know what to do with it after.  Now that I have a recipient lined up for it, I thought it would make the perfect project for this year's show.
If you are new here, every year the elementary school my youngest child attends hosts an art show where the projects are made of recycled/upcycled materials.  As the organizer, I like to contribute a project as well.

Mostly, I followed the directions over here but I don't have an AccuQuilt Go (I don't even know what it is) so I made my own template...
 ...from a cereal box of course.  I drew out a 3" square, marked the middle point at the top, connected to the corners and cut it out.  I think any isosceles triangle will work.
 I cut 60 of the triangles from random bits of scraps and clothes...
 ...and then put set them up in groups of three until I was happy with all the pattern groupings.
For assembly, start by following the directions here.  Tip: She doesn't say what to do after the 12th triangle is attached.  I kept adding in the spaces until I had a group of 5 at the top, with 5 in the spaces beneath that, and another row between the spaces beneath that.  Then I sewed the last 5 together into a "crown" and sewed that into the bottom.  I had to alternate between machine sewing and hand sewing throughout this project as it was very difficult to fit the layers through the machine.
My kids LOVED the finished project.  I believe the term "awesome" was used.  They would really like to keep it, but I have someone else in mind.  If I were to make another one, I think I would add the seam allowance to the outside of the triangle rather than inside the template (basically, make the template bigger) as this was very finickity at times.  Also, I don't think it really matters what shape your triangles are, so long as they are all the same, so I would be interested to try another one with really long, pointy triangles.

Completely superfluous picture of my sewing buddy.

Happy crafting all!

Linking up with: Keep Calm Craft On at Frontier Dreams
                        Fiber Arts Fridy At Wisdom Begins in Wonder
                        Creative Friday at Natural Suburbia

Wednesday, 12 February 2014

A simple game with items on hand.

In August, I will be attending the Carlisle Country Craft and Old-Fashioned Market that is part art/craft show but also includes family games, costumes, food and drinks, animals and demonstrations of old-fashioned and pioneer skills.  I'm in the process of getting some of the games ready for the village green, and thought I would share the first one since it would be a great indoor or outdoor activity for any event (including an "I'm bored" day).
In keeping with the theme of the event, I have kept it as old-fashioned as possible by using the fruit buckets. Note: If you are making this at home, you could easily swap out shoe boxes, mixing bowls, or whatever you have on hand.
The "points" tags are made of leftover bits of felt and pieces of a ruined wool sweater.  I just drew out some numbers (on paper)  until I was happy with the size, traced them onto the felt, cut them and hand-stitched them onto the front circle of felt.  The backing is a second piece of felt.  The two circles are blanket-stitched together to hide the stitching of the number and make it a little more durable.
Note:  My tags have to be weather proof as the event is held rain or shine.  If you  are using this game indoors, you could simply draw the numbers on to a card stock tag.
The bean bags are made of some old children's shirts.  I found the ideal size to be 4 1/2" squares filled with 2/3 of a cup of dried beans.  With 4 patterns, children can play alone, against an opponent, or even in teams.
I did make some smaller squares (3 1/2") that were filled with only 1/3 of a cup of dried beans.  If I can find one more bucket, I will pair the smaller bean bags with it as a "target practice" or solo play.
Note: If you are using this game last minute, you can easily make quick bean bags using small children's socks filled with beans and tied firmly shut with yarn.

Linking up with: Fiber Arts Friday on Wisdom Begins in Wonder
                         Creative Friday at Natural Suburbia
                        The backyard Farming Connetion

Wednesday, 18 September 2013

From the recycle bin - a pennant garland

We had our open house over at N's school last night, and I was looking for something to add interest to the "we are trying to get volunteers" table, so on my lunch break at work yesterday I came up with this little number. 
It is made of tissue boxes, and was easy peasy.  Here's the how to for new crafters:
And yes, if you are wondering, I DO choose my tissue boxes based on the patterns.
 
 
Open up the tissue box along the glued seam.

Using a paper cutter, or a pair of scissors, separate the patterned panels from those with print.

For this project, I only used the side panels.  Keep the smaller bits though - they can be used for other projects later (like these gift tags - you need to scroll down a bit).

I cut each piece to the same length (4 1/4") but I wasn't too worried about the width (tissue boxes are not standard, I have found).  I figured that would just add to the "home-made charm".

To cut the triangles, I just centered the bottom on the edge of the blade.
and then slid it over to do the other side.
NOTE:  If this project is being done by children, I recommend using scissors instead.


I hot glued along the top of the back, and tucked it up under one edge of a long piece of seam binding.
I glued all of the backs first, 

and then flipped the whole thing over to glue the front down as well.

I'm pretty sure a sewing machine could go through the cardboard as well, but hot glue is what I could fit in my purse :)

This is half of it, as we were setting up...

It's a nice, quick, easy project if you need a last minute decoration for an event that sneaks up on you.
Go ahead, start saving those tissue boxes.  You will start seeing so many ways to use them.

Linking up with: Transformation Thursday at the Shabby Creek Cottage
                         Creative Friday at Natural Suburbia
                         Craft Frenzy Friday at Obsessive and Creative
                         Homemade Monday at Frugal by Choice, Cheap by Necessity 

Thursday, 21 February 2013

Working my way through my Grandmother's Stash


Around the time my grandmother turned 95 or so, she was no longer able to remain in her home full time.  She was able to keep her home, and go spend a day or so there at a time, but for the most part she was in a nursing home.  During one of her visits to her home, she packed up a rather large fabric stash for me and sent it my way via my parents.  She has since passed a way, and for a while, I couldn't bring myself to cut into most of the pieces.  Since then, though, I have been working my way through the stash bit by bit - because that is, after all, the reason she sent it to me in the first place.  Enter:  the picnic bowl cover I saw on Meadow Magic.  I thought the fabric pictured above would make a lovely set of picnic bowl covers...
  ...and also in the stash was this piece of quilted material that I used as the inner layer.  Exactly enough to make two covers.  I simply cut my two kinds of fabric to the same size as the quilted material, serged 3 edges, and flipped it inside out.  I then folded under the last edge and sewed it shut, continuing all the way around the rest of the square to make it neat and tidy.

 The picnic bowl cover at Meadow Magic used fabric loops at the corners with caribeener style clips to hold down the corners, but I wanted a quick project.  She also referred to one that uses grommets in the corners, but I didn't have any on hand.  What I did have on hand was a handful of alligator clips and a variety of red beads from my sister.
I put a bit of beading wire through the alligator clip, strung on a couple of beads, and viola!
I made two covers and then sewed the rest into a rather long tea towel.  I will need to make some smaller ones I think, since this one is on the largest bowl I own...I guess I wasn't thinking.

 Here's a shout out to Kathryn at Kathryn's Brain.  On her "things that work" post last week, she said that if you bite a match while cutting onions, your eyes won't water.  It reminded me that I had heard if you light a candle, your eyes won't water - a huge problem for me.  I cut all the onions on the board without my eyes watering, and N was mesmerized by how much the flame was crackling, snapping, and fizzing during the process.  And since he was in the kitchen...
 ...I put him to work...(he's on a stool there...he's growing, but he's not quite that tall yet!)
...so we could have two pots of soup instead of one.  Ta-la!

Linking up with: Stash Bash with Crunchy Catholic Momma
                         The HomeAcre Hop #7 at the self sufficient homeacre
                         Fiber Arts Friday at Wisdom Begins in Wonder
                         Creative Friday at Natural Suburbia
                        

Thursday, 7 February 2013

Using up and making do...

...this one is about finishing up projects.

 I have finally finished my "floor pouf".  I started it so long ago that I can't find it in my archives.  It was inspired by a picture at maya made when she released her book.  It is made with some random piece of thick fabric from my stash, a zipper salvaged from a pair of old coveralls at work, and it is stuffed with...
... all kinds of bits and pieces.  Fabric bits too small to use, failed projects that can't be salvaged, strange pieces of material passed on to me by others (that aren't nice enough to be used in other projects), and the trimmings from the crocheted T-shirt rug project.  It took me months and months to stuff this pouf bit by bit (hence, the zipper).  I brought it out to show the family when the last bit of stuffing went in and they quite literally dove on it.
S wants one made out of old jeans, and N wants one too - he's not too particular what it will look like, so I will be saving every single piece of scrap for the next long while to stuff some more.

 I have also finally used up the herbs I had dried this past summer (the non-food herbs that is) to make a quite large sachet for the linen closet.
This one is stuffed with lavender, penny royal, mint and tansy because that's what grew well enough to harvest enough to stuff a bag.
 Remember the dyeing with walnuts post from the fall?  I just kept throwing fabric into the pot to see what else I could dye...this is the last piece that went in.  It didn't come out as I had hoped so it was in the reclaim pile.  I folded it in half, serged two sides, stuffed it, and then used some "lavender" embroidery floss to sew it shut.
I think it is so pretty!  It kind of looks on purpose, even though it was made with scraps.  I love when that happens.  Also, a note - the blanket stitch was added because when it is time to replace the herbs inside, it will be super easy to rip that out and refill it.

And because it is three things on Thursday:
#3) patience pays off.
I have been looking for a stainless steel tea kettle for camping for the last several months.  I didn't want to buy a new one (but I almost did when they went on sale 1/2 price).  I picked this one up yesterday from our local on-line perpetual garage sale for a great price.  Now I'm so glad I waited.

                         The HomeAcre Hop over at the self-sufficient homeacre
                         Backyard Farming Connection Hop # 19  
                         Keep Calm Craft on over at Frontier Dreams
                         Eat Make Grow Blog hop at Foy Update  
                         Wildcrafting Wednesday at the self sufficient homeacre


Tuesday, 11 December 2012

Free pattern - little knit toy bombs

 
When the boys were little, they had little stuffed felt blocks that they used to have indoor snowball fights with. Over the years they got pretty nasty looking and eventually got thrown out.  They miss them, and I thought I would make them some little cartoon bombs - a la video game- so thry could do it again.  They are rather quick to make...maybe a little over an hour start to finish.
I used some leftover worsted weight yarn from the stash, and size 4.5mm needles.  The gauge isn't really important so you can adjust your needle size up or down depending on what yarn you are using.  Directions will follow for a small, medium, and large toy bomb.

You are going to work back and forth on two needles for a few rows before joining in the round. 
Cast on 4 stitches onto one dpn.  
Row 1: Increase into each stitch by knitting into the back and then into the front of each stitch (kfb). 8 stitches.
Row 2, 4, 6: purl
Row 3: kfb into each stitch.  16 stitches.
Row 5: (kfb into one stitch, k1) repeat to end of row. 24 stitches.
Row 7: (kfb, k2) repeat to end of row.  32 stitches. Join in the round here for the small bomb with 12, 12, and 8 stitches on the three needles.
Row 8: knit in the round for small bomb.  purl for medium and large

Medium and large only: 
Row 9: (kfb, k3) repeat to end of row. 40 stitches.  Join in the round here for medium bomb with 15, 15, and 10 stitches on the three needles.
Row 10: knit in the round for medium, purl for large.

Large only: 
Row 11: (kfb, k4) repeat to end of row.  48 stitches.  Join in the round here for large bomb with 18, 18, and 12 stitches on the three needles.

Knit in the round as follows:
small: 5 rounds, medium: 11 rounds, large: 17 rounds

Large only:
(k2tog, k4) repeat until end of round.  40 stitches. Knit one round.

Large and medium:
(k2tog, k3) repeat until end of round.  32 stitches. Knit one round.

All sizes:
(k2tog, k2) repeat until end of round.  24 stitches.
Knit one round.
(k2tog, k1) repeat until end of round.  16 stitches.
Knit one round.
(k2tog) repeat until end of round.  8 stitches.
Knit one round.
(k2tog) repeat until end of round, putting all 4 stitches onto one needle.
Break yarn and switch to your "wick" colour.
knit in I-cord until your wick is the desired length.  Cast off.

Stuff your bomb through the opening at the bottom at stitch closed.  Weave in all loose ends.
Make a handful.  Enjoy!

By the way:  I am on the last of the "Little House" books in the box set. I don't know what I am going to read when I am done this one.

Linking up with:  Keep Calm, Craft On over at Frontier Dreams
                          yarn along over at small things

Thursday, 16 February 2012

Sometimes you just feel fancy

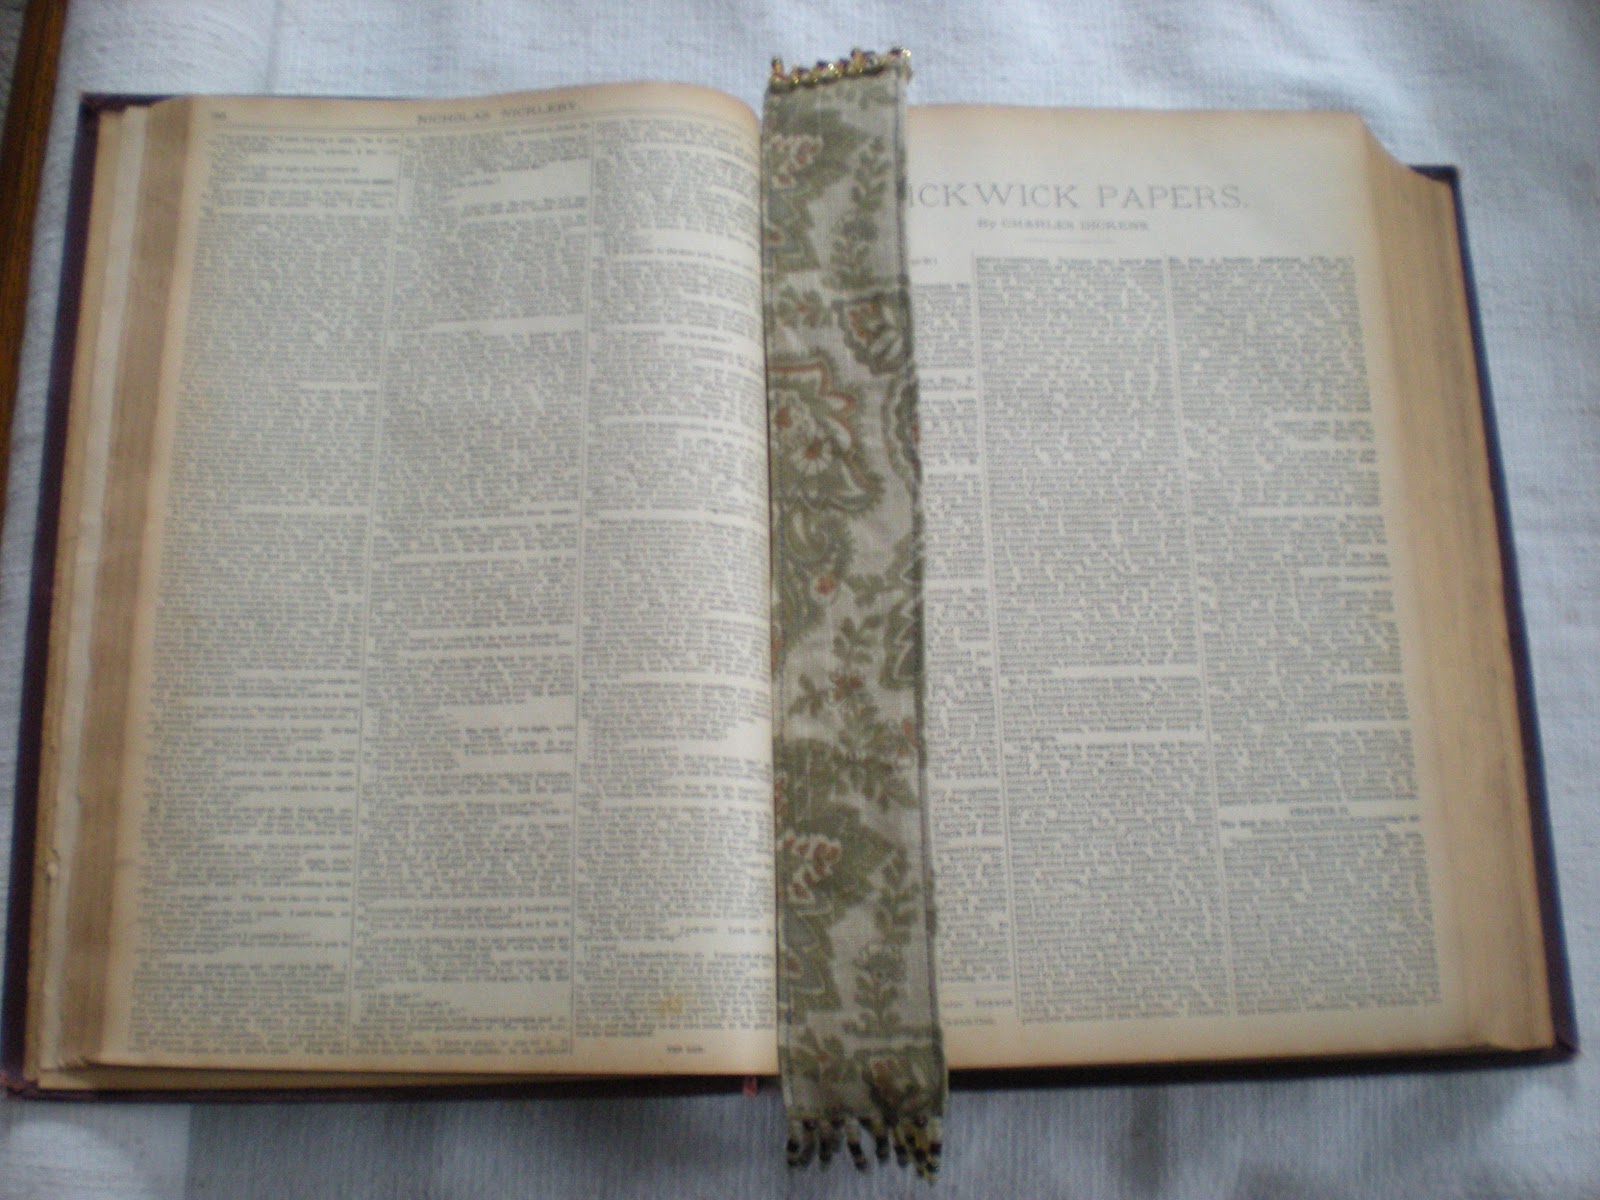
...or otherwise could be called "in which I spend way too much time on a bookmark"

In general, I am not a very fancy person.  I don't where fancy clothes.  I don't have fancy things in my house.  My garden is almost strictly functional rather than for "landscaping".  But once in the while, I find myself spending an insane amount of time on an every day item to make it just simply over the top.  This week, I did just that.

This is my new book mark.  It is gigantic.  I made it to hold the page in the book I was using for learning cables (see yesterday's post if you wish).  It is 15" long...and beaded...
This is the top.  It has three rows of beads.  Hold on, I think I have a more close-up view...
This is the bottom...
Ok, here is the top.  There is a row of dangly bits in the center, and then a loopy kind of row on each side.

and here is my very sad attempt at showing you how to make it.

I had a tiny piece left from my kitchen curtains.  Fabric that I love.  Fabric that I thought would be too small to make anything useful with, but I kept it anyways.  So I cut a rectangle, folded it in half, sewed around the edges.  Then, I strung on the beads.

I started with the middle row.  Just string the beads onto your needle in the order that you want them.  Top off the row with a seed bead, then string back through the row the opposite direction...all except your seed bead, which will hold everything in place.  Then stitch back through your fabric and do the next row. 

For the loopy rows, I strung on the beads for each loop, and placed a stitch where I wanted the loop to end, and kept going along both sides.  I took me well over an hour and a half to make this bookmark,
but isn't it fancy?!?

So, although you can see by the size of it, it didn't make much of a dent in my stash...but, it was stash busting just the same (the beads are left over from a bracelet I made for a friend a few years back).
Please come on over and join the stash bash fun at Crunchy Catholic Momma.

And speaking of fancy...it is time for Three Things on Thursdays.

I have 6 of these green goblets.  We use them for grapefruit (as here) or fruit salad, or whatever, when we are in a fancy kind of mood.  And for "feasts", warm water and a lemon wedge as finger bowls.

So, three things:
1.  Whenever we use them, N calls whatever is in them the "appetizer" (except when they are finger bowls, although they have both been known to skip the finger bowl part and just drink the lemon water).  He sets them on the table, and is just thrilled to be eating his "appetizer"...even if it was part of his supper anyways.
As I said, we are not fancy people, so a real and true appetizer does not make a frequent appearance around here.  It is enough just to get the dinner on the table most days, yes?

2.  I love them because for years, I imagined them as Tasha Tudor's finger bowls from "Becky's Christmas".
These finger bowls were a part of every holiday.  They were of thick green glass, and after dinner everyone wet the tips of his fingers and ran them around the edges of the bowls, making thereby wonderful singing vibrations without which Becky would have considered a Christmas or Thanksgiving dinner incomplete.
Note:  Mine do not make "wonderful singing vibrations".  They are just pretty.

3.  I once found another set identical to this, but in orangey-yellow at a vintage shop while I was looking for something else.  For $1.00 a piece.  It took every ounce of my will power to leave them behind (we are working on living with less "stuff", right?).  I have never been back to that particular store because I don't think I would be able to leave them behind a second time on the off chance that they are still there.

Enjoy your day everyone...will it be fancy?

Tuesday, 14 February 2012

Halted in Progress Yarn Along.

It is in fact Tuesday night, but I am going to pretend it is Wednesday morning...  and get my post ready to join Ginny at small things for another round of Yarn Along.

Moving on to a new cable this week.  This is as far as I got on it...the pattern was in a library book which I had to return today, so I am on hold.  Not to worry, I have purchased the book, and it is in transit, and should be here in a few days so I will be able to move on.

The book in the picture is Brian's Return, which apparently is the last in the series.  I had read Brian's Winter, and knew that I had missed Hatchet (the first in the series), but I was OK with that since Brian's Winter was kind of an alternate ending to Hatchet.  I didn't know that there was another book in the series that I missed called The River.  So now, I will be on the lookout for both Hatchet and The River.  Briefly, it is about a boy who is returning to the woods after two years of being in the city.  He had previously been in a plan crash and had to survive in the wilderness for months before finally making it back.  He returns because he just can't live in the city anymore.  I truly enjoyed this book...a big part of which is because we feel the need, every single day, to get our butts out of the city.  We don't know where, we don't know when, and we don't know how we are going to do it...but we feel the need.  And for some of us, it grows stronger every day.

Somehow.

And back to the yarn along...I think my cable looks OK for the first run at it.  I like it much better in white.  And I like it much better in the book.  I am hoping by the time I make the second and third of the strips I will have it looking just dandy.  The book, if you are wondering, is Country Weekend Knits and it is so nice that I have bought it.  It is only the second knitting book I have ever purchased if that gives you a hint.  Usually I get them from the library.

And...all of the yarn for this work in progress is from my stash of wool, so I am adding the link below for any that have missed it.