Saturday, 8 March 2014

Game #3 for the Village Green

I'm still plugging away at making a few of the games that will be available for families to entertain themselves with at the Carlisle Country Craft and Old-Fashioned Market Mercantile in August.


This month's contribution is "Tic-Tac-Toe" ---and in true pioneer spirit it is made from a flannel shirt, 2 pairs of corduroy pants, and a few bits of felt scraps.

You'll want to change the sizes to suit whatever fabric bits you are using, but I'll give you the run-down just in case.

I cut the biggest square I could from the back of the flannel shirt (18" square) and then used the front and the sleeves for the bean bags.  I cut 9" x 4.5" rectangles, folded them in half right sides together, sewed one side and the bottom, filled  the just under half way with beans, and machine stitched them shut.  Although it would have been easier to add the Xs and Os before-hand, I wasn't sure what I wanted to use, so I hand stitched them on after the fact.
I made a paper template for the Xs and Os to make sure it would fit nicely, and then traced them on to bits of felt.  I chose to keep them neutral, but depending on the event, nice bright colours would work just as well.

 For the "game board" I cut 6 1/2" squares from two pairs of outgrown curdoroy pants and sewed them together in a 3x3 grid using a 1/2" seam allowance.  I ended up cutting a little of the sides so that I could turn the edges of the backing over instead of using seam binding.  After the back and front were sewn together, I sewed a line 1/4" from each of the seams to give it a quilted look, and to stabilize the whole thing.
I'm pleased with the result as it looks a little "boyish" - the boys thought I should balance out the games since they thought the Hopscotch looked a little "girlish" by the time it was done.
We tested it out...I was X's...
...and one of them never learns.

Enjoy.

                        Fiber Arts Friday at Wisdom Begins In Wonder

Monday, 3 March 2014

A fun little sewing project.

This little number has been on my "Inspiration for the school art show" Pinterest board for years, but I hadn't gotten around to making it yet because I didn't know what to do with it after.  Now that I have a recipient lined up for it, I thought it would make the perfect project for this year's show.
If you are new here, every year the elementary school my youngest child attends hosts an art show where the projects are made of recycled/upcycled materials.  As the organizer, I like to contribute a project as well.

Mostly, I followed the directions over here but I don't have an AccuQuilt Go (I don't even know what it is) so I made my own template...
 ...from a cereal box of course.  I drew out a 3" square, marked the middle point at the top, connected to the corners and cut it out.  I think any isosceles triangle will work.
 I cut 60 of the triangles from random bits of scraps and clothes...
 ...and then put set them up in groups of three until I was happy with all the pattern groupings.
For assembly, start by following the directions here.  Tip: She doesn't say what to do after the 12th triangle is attached.  I kept adding in the spaces until I had a group of 5 at the top, with 5 in the spaces beneath that, and another row between the spaces beneath that.  Then I sewed the last 5 together into a "crown" and sewed that into the bottom.  I had to alternate between machine sewing and hand sewing throughout this project as it was very difficult to fit the layers through the machine.
My kids LOVED the finished project.  I believe the term "awesome" was used.  They would really like to keep it, but I have someone else in mind.  If I were to make another one, I think I would add the seam allowance to the outside of the triangle rather than inside the template (basically, make the template bigger) as this was very finickity at times.  Also, I don't think it really matters what shape your triangles are, so long as they are all the same, so I would be interested to try another one with really long, pointy triangles.

Completely superfluous picture of my sewing buddy.

Happy crafting all!

Linking up with: Keep Calm Craft On at Frontier Dreams
                        Fiber Arts Fridy At Wisdom Begins in Wonder
                        Creative Friday at Natural Suburbia

Friday, 21 February 2014

In the Studio - Feature

I'm the feature artist for "in the studio" at the Rural Creators Collective today.
 Check out the step by step mug making over here.


I'm getting some beer steins ready for the Carlisle Country Craft and Old Fashioned Market Mercantile in August.  I'm getting excited already.  You can check out pictures of last year's show over here if you like. It's a great family friendly event that will be worth the drive if you want to make a weekend trip of it (with plenty of waterfalls to visit in the area as an extra attraction).

Tuesday, 18 February 2014

Old-Fashioned Games #2

I have mentioned before that I was working on some simple, old-fashioned games to fill the village green at the Carlisle Country Craft and Old-Fashioned Market Mercantile in August.  Here is game #2 if you are looking for a fun little activity with kids.
Who doesn't love hopscotch?  For this one, I used a piece of a table cloth that I picked up at the Goodwill, and some leftover seam binding.  I used different colours for each of the sections because I want it to have a kind of patchwork look to it (the time span we are going for at the show is about mid 1800s to 1910).  Plus, I didn't have very much of each of the colours.  My squares are 11", mostly because my tablecloth was only 78" long...I would go with 12-13" if I had an unlimited amount of space.
I made the numbers from seam binding as well, and just sewed them on.  At first I was trying regular numbers, but it was rather difficult to make the 2 and 3, so I switched to the straight lines of roman numerals.
The "stones" are small bean bags made of old children's shirts.  I may or may not add a coloured stripe or circle to the ones that are the same colour.  I haven't decided yet.  They are 3" squares, with 1/3 cup of beans inside.
Note: if you are playing this game indoors, I would stop here.  It won't slip on carpet, and for wood floors, you could just lay it out on those anti-slip mats.
Mine, however, is for outdoors - and it has to last a whole weekend.  I lined the back with a sturdy piece of fabric (that happened to be a futon cover in a previous life).  I sewed it together front to front and then turned it right side out and sewed around the edges a second time.  It should be pretty tough.
Once the front and backing were sewn together, I edged all  around the squares a second time.  It gives it a quilted look while making it less likely to slip around when a child jumps on it.  I plan on adding grommet holes to the corners, and quite probably the long sides as well, so that we can anchor the game down with tent pegs.

In case you are curious, this went together in an afternoon.

Linking up with: Keep Calm Craft On at Frontier Dreams
                         Hand & Homemade Mondays at On The Old Path
                         The Backyard Farming Connection
                         Fiber Arts Friday at Wisdom Begins in Wonder
                         Creative Friday at Natural Suburbia

Wednesday, 12 February 2014

A simple game with items on hand.

In August, I will be attending the Carlisle Country Craft and Old-Fashioned Market that is part art/craft show but also includes family games, costumes, food and drinks, animals and demonstrations of old-fashioned and pioneer skills.  I'm in the process of getting some of the games ready for the village green, and thought I would share the first one since it would be a great indoor or outdoor activity for any event (including an "I'm bored" day).
In keeping with the theme of the event, I have kept it as old-fashioned as possible by using the fruit buckets. Note: If you are making this at home, you could easily swap out shoe boxes, mixing bowls, or whatever you have on hand.
The "points" tags are made of leftover bits of felt and pieces of a ruined wool sweater.  I just drew out some numbers (on paper)  until I was happy with the size, traced them onto the felt, cut them and hand-stitched them onto the front circle of felt.  The backing is a second piece of felt.  The two circles are blanket-stitched together to hide the stitching of the number and make it a little more durable.
Note:  My tags have to be weather proof as the event is held rain or shine.  If you  are using this game indoors, you could simply draw the numbers on to a card stock tag.
The bean bags are made of some old children's shirts.  I found the ideal size to be 4 1/2" squares filled with 2/3 of a cup of dried beans.  With 4 patterns, children can play alone, against an opponent, or even in teams.
I did make some smaller squares (3 1/2") that were filled with only 1/3 of a cup of dried beans.  If I can find one more bucket, I will pair the smaller bean bags with it as a "target practice" or solo play.
Note: If you are using this game last minute, you can easily make quick bean bags using small children's socks filled with beans and tied firmly shut with yarn.

Linking up with: Fiber Arts Friday on Wisdom Begins in Wonder
                         Creative Friday at Natural Suburbia
                        The backyard Farming Connetion

Thursday, 6 February 2014

A bit of this, a bit of that...

I have finished the first gift for the Winter Solstice/Christmas stash.  Itty bitty little stitches...52" of them...
 ...I finally ironed it at 4:00 a.m. today so that I could make sure it wasn't all twisted before I cast off.
It seriously took me all of January to knit this tie, but I love the finished product, and I know a certain little dapper fellow will too.  Having said that, if I decide to make another, I don't think I will use sock yarn.

February's project is washcloths.  I cast this one on according to the pattern (which called for 63 stitches of worsted weight cotton.  It's huge!   I will finish this one the way it is, but the next couple will be cast on with maybe 43 stitches.  I will pair them up with a pottery soap dish and a bar of fantastic handmade soap. I am hoping to get four of these done this month.

 On the pottery front - the first teapot pod (teapod?) is finished.  N thinks it looks like a genie lamp, but I like it none-the-less.  There will be more - possibly with a shorter spout.  It's still drying.

 Test spoons.
Test pods.  Nothing is glazed yet.

And just because I thought this was hilarious...N was using this work space last night.  A dremel, chisel, a bunch of very sharp utility knives and blades, and a stuffed knit penquin!  One of these things is not like the others.  You may recognize Linda's penquin.

                        Fiber Arts Friday at Wisdom Begins in Wonder

Tuesday, 21 January 2014

In which I use the whole jar...

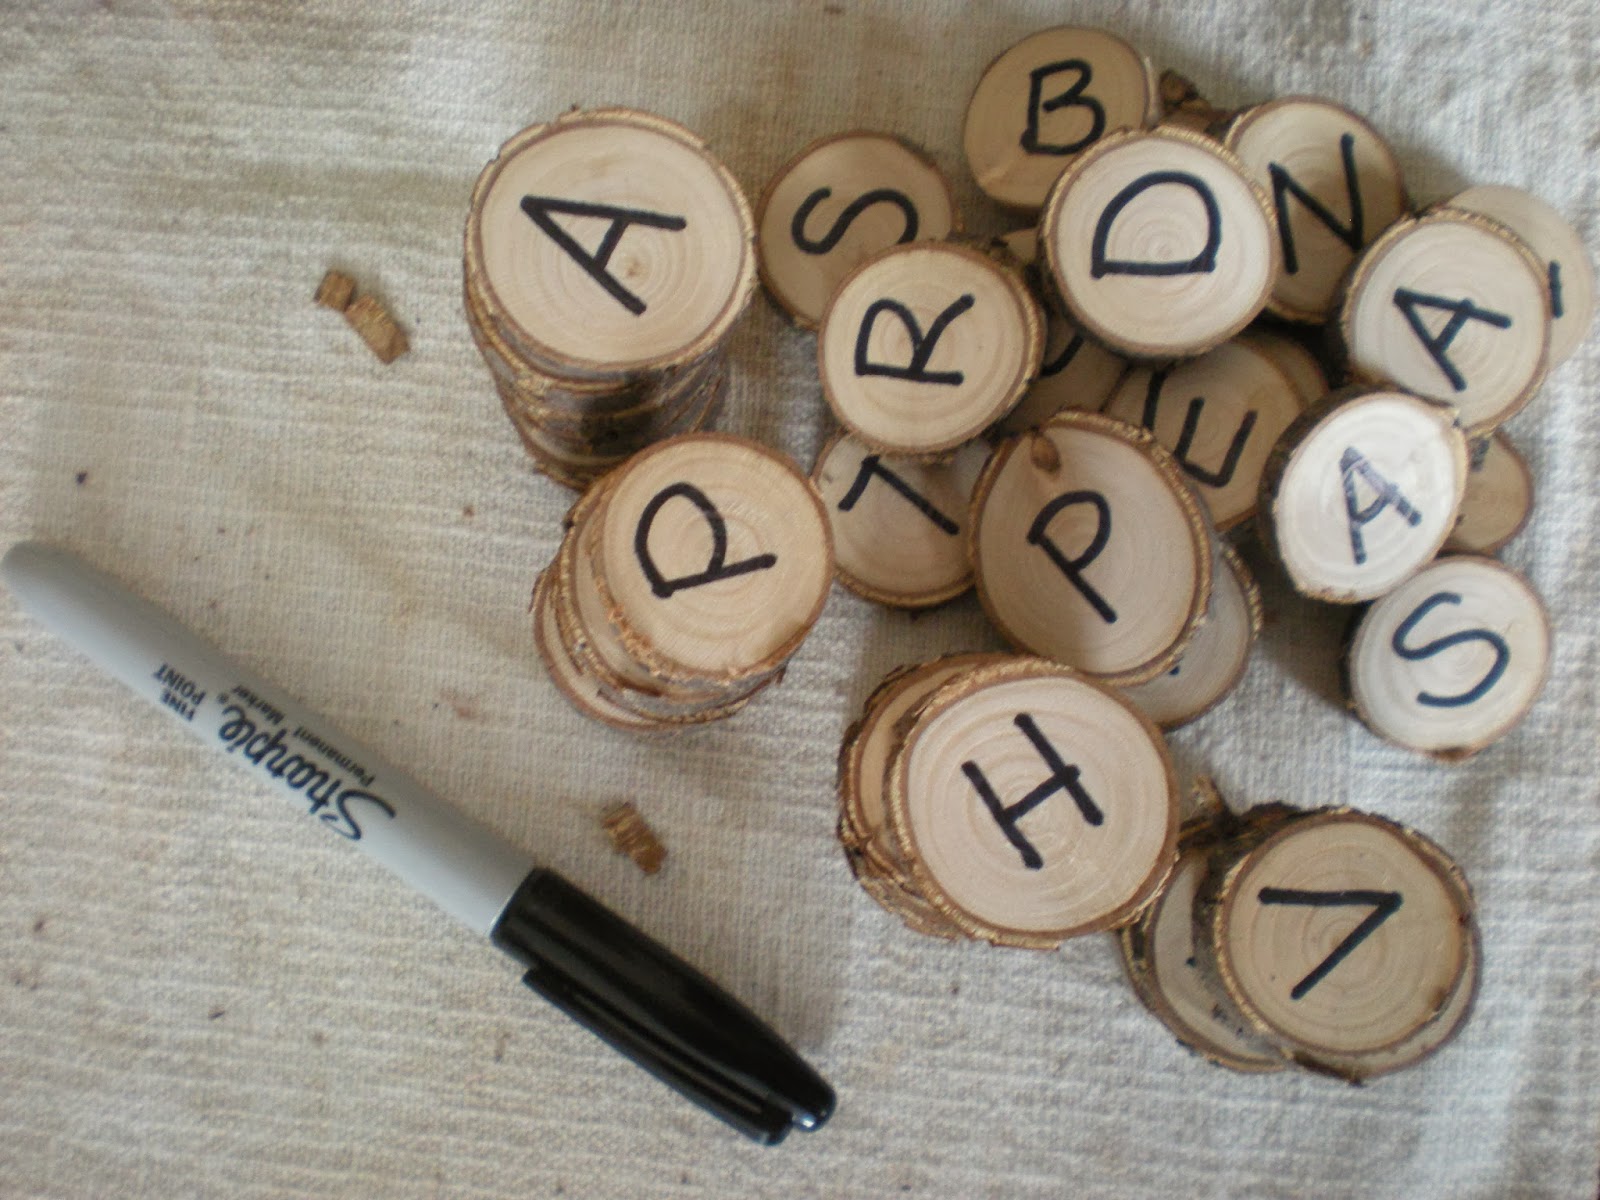
Yesterday, I shared a few branch slice project ideas (you can see the whole list over here).  N walked right in and started rearranging the few letters I had made to make other words, and asked if they were for Carlisle (the August show I will be doing...a kind of pioneer festival).  What a great idea!
I made one full set of the alphabet and then just used up the rest of the slices in my mason jar making duplicates of the most popular letters.  If you are wondering why I have a mason jar full of branch slices, they are left over from the name tags I made for the Earth SmART Art Show at the boys' school two years ago.
At the show last year, everybody with small children walked straight past my booth (I make and sell pottery, by the way) so that their children wouldn't break things.  I have been trying to think of something I could arrange so that the small children could "hang out" while their parents have a quick peek.  So, I have wrapped these up in a little cloth bag to take with me.  I will spread out a blanket near the door of my booth (we are on grass, in a big open field) and have these available to play with.  I will be keeping an eye out for other simple, old-fashioned, natural entertainment I can add to the blanket.

Isn't the boy clever?

Monday, 20 January 2014

Playing around with gift tag ideas

Yesterday I was working on a blog post for the Rural Creators' Collective, and I think I may have come up with this years' gift tags.  You can see the full post on the link above, but the ideas I think I may work with for myself are here.
I picture these strung on a length of yarn and wrapped around the package.  Each package can have a different word, maybe?

 I am really liking the lady bugs for spring gift tags.

And this may be the idea I use throughout the year...the picture is from an old, ripped picture book and is just modge podged onto the branch slice.  I think I will make up a big batch for all seasons, and then a separate batch for Christmas gifts for the teachers.

Did you work on any quick crafts this weekend?


Thursday, 16 January 2014

Planning ahead - Knitting for Christmas

I got myself into a bit of a jackpot this year.  Normally, I have everything all planned out and work on projects throughout the year so that by the time Winter Solstice and Christmas come around, I'm ready without any last minute stress.  Not this past year...nope...this past year I ended up scratching just about everything off the list, and as a result, I feel like we didn't really celebrate "properly".  No homemade cards were sent, no gifts to the staff at the school (other than for N's teachers), a 6 hour trip to the emergency room eliminated our winter solstice celebration...and on and on.
So, in an effort to get a few things done in advance, I am really hoping to finish up one project every month so the same thing doesn't happen again.  First up, is a little knit tie inspired by this one over at The Purl Bee.

The safety pin is to make me feel better.  It's hard to see the progress as I go, so every night I move the safety pin up to where I am starting from and I knit until I can see that I have done a few inches.
Some nights I only manage two inches, sometimes up to four.  I'm using a ball of sock yarn from my stash so that I have an even pattern without doing colourwork.  I am hoping to have this project finished up by the end of the month, and if I do a few inches every day, it should actually happen.  Then hopefully it will actually make it to Christmas!  A little someone I know doesn't own a tie and needs one from time to time, so knowing me, it is quite possible that it will come out of the "gift stash" at some point throughout the year.  We will see how it goes.

If anyone else wants to play along, we can help keep each other inspired.  Feel free to leave a comment on any posts to share what have planned and/or what you are working on.  Happy crafting!

Linking up with: Fiber Arts Friday over at Wisdom Begins in Wonder

Tuesday, 14 January 2014

Introducing the Pod Collection

Wow, that was a longer break than I had expected - partly because I kind of felt that I had nothing of note to share.  You see, I was hoping to share the beginning of my Pod Collection, but I've had a few mishaps along the way...so instead of showing the finished products for all of them, some will be photos of the initial stages.  Here we go:

 #1: The Pansy Pod...not sure why I call it that, because really I see it full of violets in the spring.

#2: I call this one William...Mr. William Power - it's a toonie pod (that's our $2 coin, for those of you outside of Canada) that you have to smash to get your savings out.  I estimate it can hold about $1000.00 when full.

#3: The Daffodil Pod:  It seems I always make the vases with spring flowers in mind, but I think this pair would look great with a single large hydrangea in each one.

#4: Luminaria pods...the one on the right sold before it was even glazed (although I did glaze it) and I see many more of these in the future.  There is a whole in the back to slide in a tea light.

#5: The salt pig...unglazed on the inside to absorb moisture, glazed on the outside for easy cleaning.  I think I want to make little tiny clay spoons for the next ones I make, unless I can find some little wooden ones for a reasonable price.

#6: The Pitcher Pods...these two met with disaster.  When test firing my first batch of glazed pieces in my "new to me" kiln, the cone racks on the top two shelves exploded and hunks of clay stuck to all the pieces on those two shelves.  These are now in my "to be smashed for a mosaic" pile.  I will be making more but sometimes it's hard for me to remake something I have already done.  I have to wait for the mood to strike again.

#7: The First Birthday Pod...inspired by river rocks.  I have actually found little beeswax birthday candles to fit these.  I picture this becoming a great tradition in some families...using the birthday pod for every birthday, or really any special event for that matter.

#8: The soup and sandwich pod...this one was in the same glaze load as the pitchers.  There were actually 2 plates and two bowls, of which only one bowl remains unaffected.  It looks lonely by itself, but it's in the Carlisle shop none the less.  By itself it looks like a change bowl.

#9: The pen/pencil pod...As yet these are unglazed because I'm not sure what to do to them.

#10: The Candy Dish Pod...N wants one so so so badly.  I told him I will have to finish these for my next show, but that maybe, just maybe I would try to make another.  The child likes the pods as much as I do.  He already has a toonie pod, and a candle pod.

My plan is to make 52 different pods, hopefully with a good variety by April when my next round of shows start up again.  They are kind of addictive.  Every time I make one, I come up with another.  

So, honestly...I could use some input.  I like them personally (a lot), but are they a little boring for most tastes?  I had originally planned to glaze them all in white, but some of them seem to cry out for colour.  I am trying to imagine them set up all together for a show...mostly white with the occasional pop of colour?  All neutrals, like the river rock inspired candles?  Feel free to leave a comment if you have a suggestion.

And just in case you were wondering...this is what the "explosion" looked like.  Yikes.

                         Creative Friday at Natural Suburbia