Showing posts with label recycle bin. Show all posts

Thursday, 17 April 2014

Annual Elementary School Art Show

For the past 5 years or so, the elementary school my youngest attends has hosted an art show where every piece of art is made of recycled, repurposed or upcycled materials.

Here is what the students (and classes) came up with this year:

 One little girl made an elephant out of an old vacuum cleaner.  Hilarious.
 Not having seen any of the projects in advance, we were thrilled to see that some naturally went together, by colour or style.  See those paintings...the person who submitted them found the frames in the garbage.  They just needed a cleaning, sanding, and coat of paint.
 This was a big hit with so many of the kids.  

 Nice bright magazine page art.

 N, of course, made this monster candy jar by reclaiming the clay I trimmed off my pottery pieces.

 This was a class project (I forgot to take a picture of the artist who's work this is based on).  They made a video to go with it, which we played on a loop through the evening.
 Kindergarten project:  They had a hard time understanding why they couldn't take their little bugs home with them last week, so we gave them a tour of the show in the afternoon.  Now they get it.
 One family worked together to build a whole house and yard out of recycled materials.  This little cauliflower was one of my favourite bits.
 There was a whole collection of these little robots made of scraps and leftovers, made by the grade 4/5 class.

 Ah, the sloppy jalopy...one of the big hits of the show.  It's an old bike that someone has had in their garden for a couple of years, fixed up with a few bits added.  The little fold down table goes back up and locks into place in the triangle of the bike frame.  The front of the drink holder even has a bottle opener attached to it.  Note the rolled up picnic blanket rolled up and strapped in underneath the bottles.  
 Another kindergarten project...a whole collection of little owls made of juice lids and bottle caps.  As much as I love that the projects are all made of recycled materials, it is sometimes a little discouraging to see how much waste is still being produced.  There were about 25 of these owls, each of which had water bottle lids for eyes.  Why, oh why, are people still drinking water from plastic water bottles with all the options out there?
 One of the teachers brought in all of these partition walls from their church.  It really helped make the displays come together.  It was nice to have the teachers on board this year.
The special needs class outdoes themselves every year.  These sheep are made of the material they used to use to make casts but that isn't used any more (our school is across from a hospital).
Here's a close up:

It was a fun night, once again!

Linking up with: Creative Friday at Natural Suburbia

Tuesday, 15 October 2013

DIY Birch branch packaging from cereal boxes

Handmade Holidays - another packaging upcycle...

I like to get as many things as possible ready in advance once the holiday season approaches.  I like to wrap gifts early to get them out of my closet, BUT, I don't like having them under the tree early as I think it puts too much emphasis on the gifts, and over stimulates children.  I think I have come up with a solution:
These faux birch branches can go out early, as part of the decorations, and I am the only one who will know they are stuffed with little gifts.  They are pretty easy to make, too:

You will need:  cereal boxes (one box makes one branch, but 2 boxes makes 3 branches)
                        a tube to wrap the cardboard around - the "shaper" (I used a tube of caulking)
                        a circle to trace that is larger than your tube (I used a mason jar lid) 
                        carpenter's glue
                        white paint, paint brush, brown markers (or black)
Note:  You can make a short, thick branch, or a longer thin branch depending on which way you wrap your cardboard...just keep it in mind when painting (to follow).

Cut your cereal box to the size you need to fit around the tube, making sure to leave enough space to overlap.  Using white craft paint, lightly brush on streaks to represent the paper-like birch bark.
 Continue layering on the paint until you have the look you like.

Loosely wrap the "bark" around your tube "shaper", run a bead of carpenter's glue along the edge and use rubber bands to secure it in place. Allow it to dry completely before pulling out your "shaper".
Add some birch markings to your "branch" using markers, pencil crayons, or paint.

Trace your "shaper" onto the cardboard and then trace a larger ring around it. Use a pencil, and mark it lightly so that it won't show when you are done (or mark it on the patterned side).  Here, I traced the caulking tube for the inner ring, and the mason jar lid for the outer ring.  Note: you want your cap to fit INSIDE your finished cardboard tube, so when cutting your notches, you want to go all the way inside the inner line.
Draw on the notches that you need to cut, as in the picture above.  If you are doing this with a child, I recommend marking the cutouts all the way around.  If you are doing it yourself, you can eyeball it.
Cut the notches.  I didn't go far enough here, so I had to go back and cut the slits a little longer, to go to the inside of the inner ring.

Draw the growth rings on the cap.  I made mine all wonky and freehand, but you could use a stencil or compass if you like.

Bend down all of your tabs, making sure to bend them far enough to fit inside your bark tube.

Run a bead of glue inside the tube, close enough to the edge that your tabs will reach.

Insert your cap and let it dry.

 Insert your little gift.

Glue the remaining cap on the other end.
Ta-LAAA!  A couple of little presents that will be camoflauged as decorations.  Sneaky sneaky.  I plan to do this with anything that will fit in the tubes...I would like a good little pile of them.  I might even leave some empty ones on top.

                          Wildcrafting Wednesday at Mind Body and Sole 
                          Creative Friday at Natural Suburbia
                          From the Farm Hop at Fresh Eggs Daily
                          Homemade Monday on Frugal by Choice, Cheap by Necessity 
 

Monday, 23 September 2013

Tissue box upcycling part 2, and some recipe links

I promised you more ideas for those wonderful tissue boxes, so here is part two:  price tags.
 I happen to have this handy dandy Fiskers circle cutter, but tracing a small cup and cutting it out works just fine too.  I cut a variety of sizes because a small tag looks ridiculous on a big piece, and a big tag looks ridiculous on a small piece.
 
 I also (by eye) cut some strips from the side panels of the boxes, and then trimmed off the corners.
Punch a hole, and voila!  Custom made price tags for your lovely hand crafted items.  The store I have my pottery in right now has a big focus on eco-friendly packaging, so I thought these would fit the bill.  They are big enough that I can write a little description or care instructions if I need to.
AKA: gift tags too, if you need to label a whole bunch of things.  I actually like to make a whole bunch of these at once and then keep them in a bowl for adding a tag to just about anything.
I tie them on with yarn or twine.

As always lately, there is pottery drying and awaiting transport to the kiln.

And since it was nice and chilly this weekend, I took the opportunity to test out a few recipes:
 This Amish Coleslaw  that I found at The Sanctuary Homestead.  Thank you Kristine.  I imagine you are supposed to wait a while before you eat it, like pickles, but we cracked one open the same day and it is quite tasty.  Crunchier than I was expecting.  3 out of 4 of us enjoyed it a lot... surprisingly, N (who loves coleslaw normally) would not eat it, but S, who usually only eats it if he HAS to, gobbled it right up.
 And these Chocolate chip zucchini, coconut cookies from Practical Stewardship were a big hit.  They were meant to be for snacks before cross country training, but everyone snuck some in their lunch today.  I guess that means they like them.

Linking up with: Frugal by Choice, Cheap by Necessity for Homemade Monday
                         Keep Calm Craft On over at Frontier Dreams

Wednesday, 18 September 2013

From the recycle bin - a pennant garland

We had our open house over at N's school last night, and I was looking for something to add interest to the "we are trying to get volunteers" table, so on my lunch break at work yesterday I came up with this little number. 
It is made of tissue boxes, and was easy peasy.  Here's the how to for new crafters:
And yes, if you are wondering, I DO choose my tissue boxes based on the patterns.
 
 
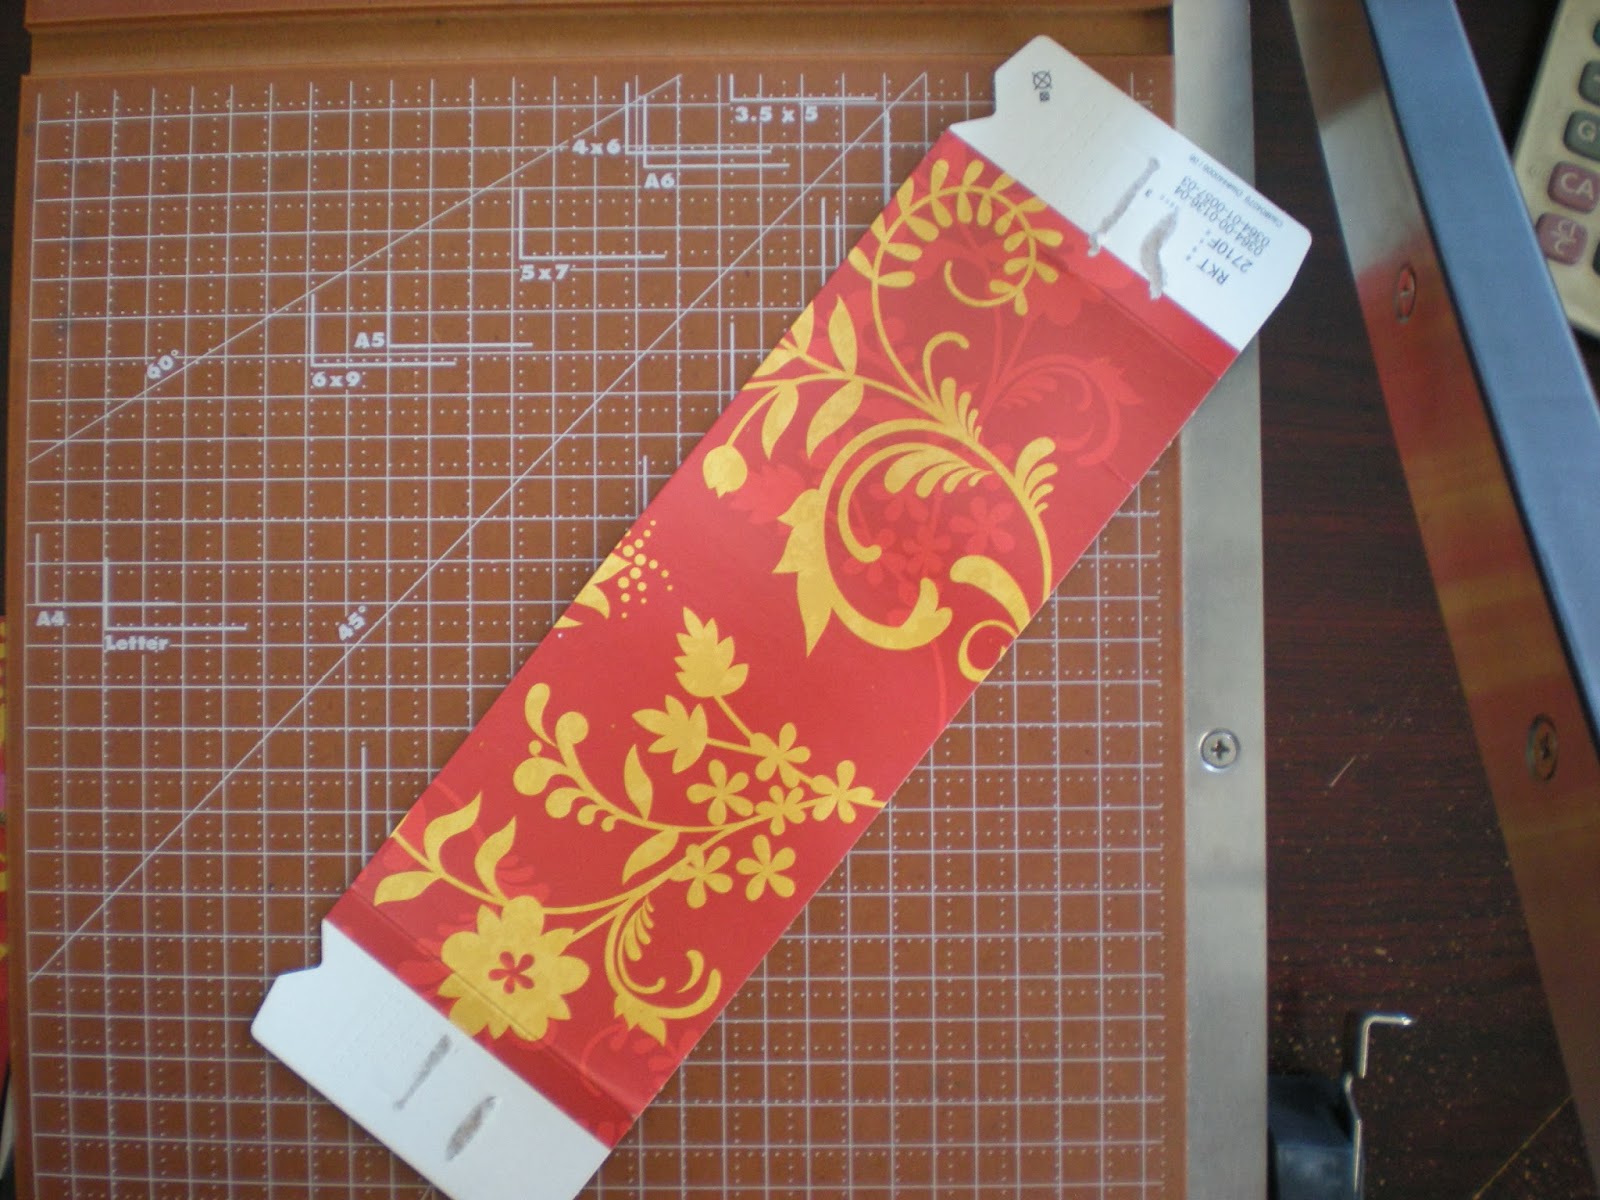
Open up the tissue box along the glued seam.

Using a paper cutter, or a pair of scissors, separate the patterned panels from those with print.

For this project, I only used the side panels.  Keep the smaller bits though - they can be used for other projects later (like these gift tags - you need to scroll down a bit).

I cut each piece to the same length (4 1/4") but I wasn't too worried about the width (tissue boxes are not standard, I have found).  I figured that would just add to the "home-made charm".

To cut the triangles, I just centered the bottom on the edge of the blade.
and then slid it over to do the other side.
NOTE:  If this project is being done by children, I recommend using scissors instead.


I hot glued along the top of the back, and tucked it up under one edge of a long piece of seam binding.
I glued all of the backs first, 

and then flipped the whole thing over to glue the front down as well.

I'm pretty sure a sewing machine could go through the cardboard as well, but hot glue is what I could fit in my purse :)

This is half of it, as we were setting up...

It's a nice, quick, easy project if you need a last minute decoration for an event that sneaks up on you.
Go ahead, start saving those tissue boxes.  You will start seeing so many ways to use them.

Linking up with: Transformation Thursday at the Shabby Creek Cottage
                         Creative Friday at Natural Suburbia
                         Craft Frenzy Friday at Obsessive and Creative
                         Homemade Monday at Frugal by Choice, Cheap by Necessity 

Tuesday, 20 August 2013

DIY packaging #2

In case you missed it, my first batch of cereal box packaging can be found over here.  I still needed something a little larger, and came up with these:


They are quick and easy to make, because they take advantage of the fold lines already in cracker and cereal boxes.  Here's the how to:
Cut open the box to lay it flat.  You will want to cut along the side that is glued shut.
 Mark the center of your box at the top and lay your template down to trace.  I found that no two boxes in our cupboard were the same size, but that the template still fit on all of them.  (More on making your template later on in this post - seems backwards, I know, but bear with me).
 Trace the template on both sides of the box, and add tabs as indicated in the photo above.  Cut along all the blue lines.


Using a straight edge, make a fold in the side panel.  Make sure that you are at a 90 degree angle from the existing folds in the box.
 I punched holes in mine to add a ribbon.  You may choose to cut a handle instead, or punch just one hole...
Run hot glue Edited to add:  the hot glue only lasted one day before cracking apart again.  I will stick with my trusty carpenters glue - just make sure to clip it with a clothes pin or weigh it down while it dries.  Run glue along one of the tabs  - whatever side is going to be the OUTSIDE of the box, is the side that gets the hot glue...
 ...and press it firmly into place, hold it down  clip it with a paper clip, clothes pin, alligator clip, etc long enough for it to dry.  Repeat with the other four tabs.
Ta-la...you have a package.  If you are normally of the "tissue paper pouf in a gift bag" persuasion:
 you are pretty much done.


Now, for the  template...  I drew the first one free hand.  Well, more specifically, I drew HALF of the template free hand, cut it, and then folded it over to draw the other half exactly the same.
  
For round two:
 I traced the pottery plate that was going into the package so that it would fit perfectly...added my branding sticker, a ribbon and a pottery button and my eco-friendly packaging for a door prize was finished.
 Top view - it's the exact same size.

Then, I tried a cracker box:

I traced a lid...find any size or shape that you want if you don't want to try freestyle...
 ...and used a straight edge to join it down to the bottom (still making sure to center it).
 Cut the same tabs,
 
and then have some fun with it.

Quick, easy, from the recycle bin, and customizable.  A win on every level.

Linking up with:  Keep Calm Craft On over at Frontier Dreams
                          The hop at the Backyard Farming Connection
                          Wildcrafting Wednesday at Mind Body and Sole
                          Transformation Thursday at The Shabby Creek Cottage
                          Creative Friday at Natural Suburbia