Showing posts with label recipe. Show all posts

Monday, 23 September 2013

Tissue box upcycling part 2, and some recipe links

I promised you more ideas for those wonderful tissue boxes, so here is part two:  price tags.
 I happen to have this handy dandy Fiskers circle cutter, but tracing a small cup and cutting it out works just fine too.  I cut a variety of sizes because a small tag looks ridiculous on a big piece, and a big tag looks ridiculous on a small piece.
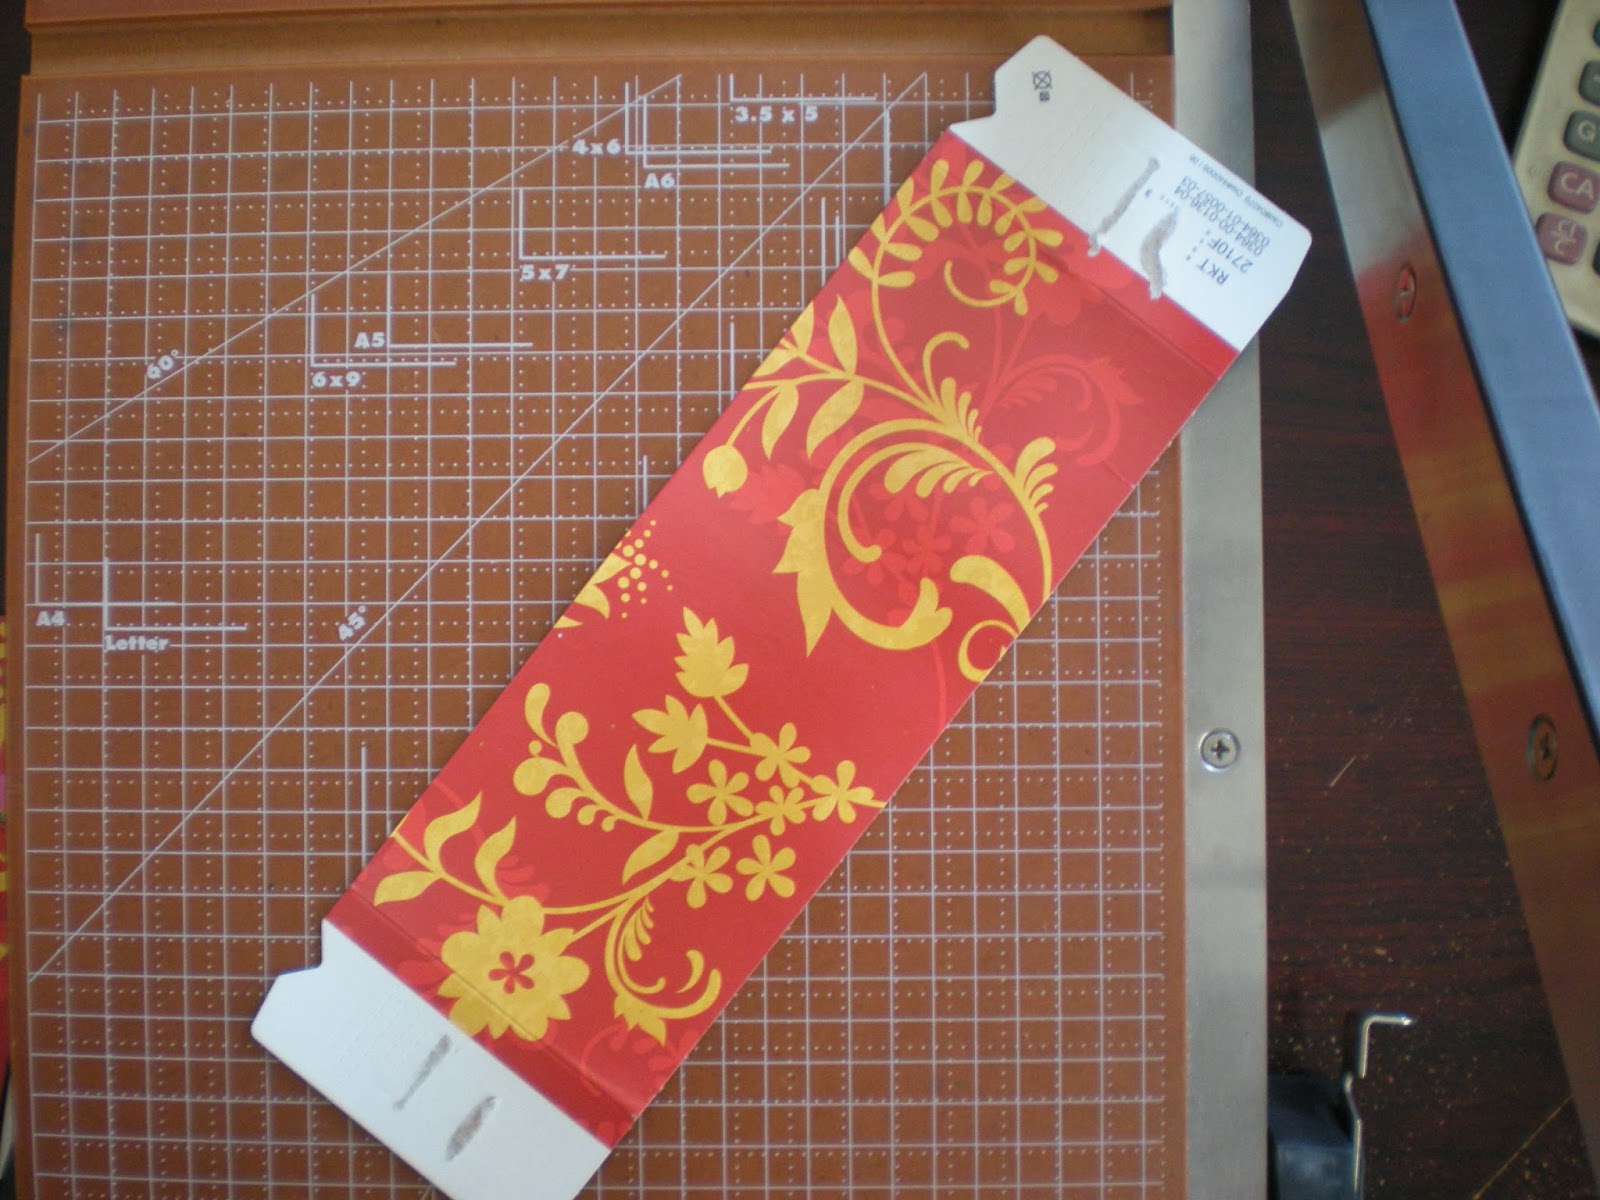
 
 I also (by eye) cut some strips from the side panels of the boxes, and then trimmed off the corners.
Punch a hole, and voila!  Custom made price tags for your lovely hand crafted items.  The store I have my pottery in right now has a big focus on eco-friendly packaging, so I thought these would fit the bill.  They are big enough that I can write a little description or care instructions if I need to.
AKA: gift tags too, if you need to label a whole bunch of things.  I actually like to make a whole bunch of these at once and then keep them in a bowl for adding a tag to just about anything.
I tie them on with yarn or twine.

As always lately, there is pottery drying and awaiting transport to the kiln.

And since it was nice and chilly this weekend, I took the opportunity to test out a few recipes:
 This Amish Coleslaw  that I found at The Sanctuary Homestead.  Thank you Kristine.  I imagine you are supposed to wait a while before you eat it, like pickles, but we cracked one open the same day and it is quite tasty.  Crunchier than I was expecting.  3 out of 4 of us enjoyed it a lot... surprisingly, N (who loves coleslaw normally) would not eat it, but S, who usually only eats it if he HAS to, gobbled it right up.
 And these Chocolate chip zucchini, coconut cookies from Practical Stewardship were a big hit.  They were meant to be for snacks before cross country training, but everyone snuck some in their lunch today.  I guess that means they like them.

Linking up with: Frugal by Choice, Cheap by Necessity for Homemade Monday
                         Keep Calm Craft On over at Frontier Dreams

Wednesday, 17 July 2013

Homemade Frozen Treats For Summer

It's berry season.  What better way to use up an abundance of berries than some simple homemade frozen treats to get you through the heat wave?  On the left, currant sorbet.  On the right, frozen gooseberry yogurt.

First up:  Sorbet.  We had an abundance of red currants, so that's what we used this time around.

Bring to a boil: 4 pounds of red currants (stems removed) with 3 cups of water in a large pot until the skins crack, mashing if necessary.  Reduce heat to medium and continue at a low boil until most of the colour is gone from the berries and the juice is dark red.
Pass the berries through a food mill or sieve.  Discard the seeds and skins.
Add honey to taste.  We added 1/2 cup of honey to this batch because the boys like it super tart.  For myself, I would add about a cup.  Yields about 9 cups.
Pour into freezer safe containers.  Cool, then freeze for at least 6 hours.

Gooseberry Frozen yogurt.

Bring to a boil: 2 pints gooseberries (stems removed) with 4 tbsp water.  Mash them, and boil for about 5 minutes longer, or until they are starting to thicken up.  
Excuse the nasty picture, but it sure is difficult to capture the consistency on camera.
Pass the berries through a food mill or sieve.  Add 4 tbsp cane sugar and stir until dissolved.  Stir in 2 cups of vanilla yogurt.  Pour into small mason jars.

 Add the lid after they have frozen.  Enjoy!

In the next week and a half, my oldest has to have 5 teeth pulled AND get braces.  Hopefully these frozen goodies will go a long way to helping with the comfort level.


Monday, 4 March 2013

What I'm eating...

I very much enjoy sushi (although not with fish, raw or otherwise) and we do sometimes make it at home when the craving strikes, but let's face it --- rolling enough sushi for a family is quite time consuming.

Enter...
...the sushi bowl. 
Sticky rice (1 part rice to one part water, bring to a boil, cover, reduce heat and simmer for 10 minutes, turn off the heat and let it steam with the lid on for 20 minutes) ---
with sushi rice seasoning (for 2 cups of rice I use 1/4 rice vinegar, 2 tbsp sugar, 1 tsp salt - heat until dissolved, pour onto sticky rice and cool) ---
and then everything I would normally put into the sushi, except it is cut into bite sized pieces.
I serve it with edamame, and I try to always include a bit of protein...shrimp, "crab", leftover roast beef or pork.  The fun part is I chop up all the toppings and everyone makes up their own plate with what they want.  N and I also scoop some onto squares of seaweed.  No complaints (gasp).

As you can see from my plate...we have had to revert back to much less seasonal eating for the remainder of the winter.  Although I am still trying to buy local produce (the peas, peppers, and mushrooms) we are clearly also eating imported food (it really is a shame I can't grow avocado, mango, etc) to get some variety.

We are on our last jar of jam.  All of the "good" pickles are gone and we are down to the jars of jalepeno dills I made for my husband.  It seemed like a lot by the time I was done canning last summer, but I have a better idea of how much we will need this year.  Herbs, I still have a-plenty! and there are still berries in the freezer, although not too many.  For the "eat what you grow/grow what you eat challenge" we are down to about 5 days a week instead of every day.  There is room for improvement...and so we shall try...

What are you eating this week?

                         The Backyard Farming Connection
                         Eat Make Grow Blog Hop at Pocket Pause 

Tuesday, 19 February 2013

Low tech kitchen gadgets and home cookin'

I thought I would share two of my handy dandy kitchen gadgets with you...
 My trusty mortar and pestle - I use the same one for grinding bread crumbs, herbs, crackers/cereal or whatever else I need to grind.  I was laughing at my own self this weekend while making up a batch of bread crumbs.  I used to buy bread crumbs in a package.  I guess I just thought it would be a big job to do a whole container full at a time.  Now, whenever I have that last slice of bread that is going stale - I chop it up into crouton size pieces, and toss them into a bowl to dry.  When I need bread crumbs for dinner, I just grind what I need.
And this...it is actually and old wood working mallet, but I use it for smashing my potatoes.  I cook the potatoes (in the microwave - I know...still working on eliminating the microwave cooking) and then smash them flat with my mallet, drizzle on some olive oil and a little salt and roast them in the oven until they are nice and crispy on the outside.  Even picky pants N (who does not like potatoes-or anything else it feels like some days) will eat these.

Do you have any low tech kitchen gadgets you just love to use?
Both were used Sunday to make our "smashed pork tenderloin" - a dish I save for weekends, but which really only takes an hour to make the whole dinner.  Not sure why I always think of this as a labour intensive meal.

And since I was in the kitchen...here are some easy peasy home-made chewy granola bars:
 In a large bowl, mix 2 cups quick oats, two cups puffed millet (or puffed rice, or rice crispies or whatever you like that is kind of light and fluffy), one cup of nuts (I used pecans here but almonds are delicious), one cup flaked coconut - unsweetened, 1/2 cup chocolate chips (or more), one cup dried fruit of any kind you like, one 14 oz can of sweetened condensed milk, and 2 tbsp butter.  Pat it into a 9" x 13" pan lined with parchment paper.  Bake at 350 for 20 minutes.  Wait a few minutes for it to cool and then cut into bars.
Mmmm.  These are so great in the lunchbox...if they make it that far.

And if you are in the mood for baking:
I finally got around to making the 100% whole wheat bread from old world garden farms and it was indeed delicious.  It doesn't need to rise for nearly as long as my old recipe, and it is really nice and fluffy...not at all dense like most whole wheat breads.  I will be making this again.

And here is something disturbing:
While grocery shopping the other day, I was in the baked goods aisle which I seldom visit.  I was in the mood for biscuits with dinner and wasn't sure I would have time to make them after finishing the groceries.  There was a package with 6 little biscuits for $4.99!  $4.99 for 6 biscuits???  Yesterday, I made 16 for about $2.00.  Half went into the freezer for the next time I get a hankerin' for a biscuit.

It was a re-fill the freezer kind of weekend (yay for new stat holidays).  What did you do with yours?

Linking up with: The Backyard Farming Connection
                         Keep calm craft on over at Frontier Dreams because I'm creating in the kitchen.
                         Homestead Barnhop over at The Prairie Homestead
                         Homemade Mondays at Frugal By Choice, Cheap by Necessity
                         Eco Kids Tuesday at Like Mama Like Daughter 
                         What I am Eating over at Townsend House


Wednesday, 23 January 2013

A twist on a Classic and an Eat what you grow update

I am pretty sure that every French-Canadian family has it's own tourtiere recipe (a kind of meat pie, I suppose) that is passed down through the generation.  I imagine that every generation puts a little twist of their own to suit their tastes and their needs.  Although we love the flavour, "someone" in my household is not to keen on the idea of eat pie for dinner.  So, here is my twist on the classic tourtiere...
Saute one chopped onion with about a cup of chopped celery in a tbsp or two of butter until they are soft.  You want the leafy, inside bits for this, not the green outside stems (which suits me just great because for eating raw, I only like the green outside stems).
Add in about 1 pound or thereabouts of ground pork (or whatever ground meat you like to use - I like pork - my mother uses a blend of meats in her tourtiere) and saute until the meat is cooked through.  Add 1/4 cup boiling water, 1 tsp each salt and pepper and dried thyme.  Cook down until the water has pretty much evaporated.  Then add a sprinkle of cinnamon, nutmeg, ground cloves (don't add these earlier on or the whole thing will become bitter).

Normally, at this point you would refrigerate it until cool and then put it into a pie crust to bake...but we twist it up...
Cut a baguette in half and remove some of the inside "guts" to make room for your filling.
I save these, dry them, and use them as bread crumbs...unless someone sneaks into the kitchen and polishes them off before I can dry them out.
Spoon your filling "generously" into the bread trough.
Side view so you get a better view of the spooned out bread.  I serve this with a salad on the side, or some nice sauteed green beans and mushrooms.  Really any vegetable that you like will work.
It's a quick weeknight meal because the filling doesn't have to cool, and then you don't have to bake the pie.  How awesome is that?  Oh - we cut a baguette into 4 pieces, but the filling is more than enough for that...someone usually takes the rest of it in their lunch the next day.


I realized that it has been a while since I posted about my self-imposed eat what you grow/grow what you eat challenge, mostly because I thought it would be a little boring for my readers to read the same list all through the winter.  I also realized that when we are home (not on holidays or visiting family) we eat something from the garden every day without even trying or thinking about it.  Jams, pickles, salsa, relish, pizza sauce, spaghetti sauce made with home-canned tomato juice, dilly beans, etc have kept us in good supply.  The mainstay though, are the herbs.  I put them in almost everything I cook.  Plus we use them for tea.
They were on several different shelves before, but when we were putting the dining room back together after painting (that nice light green in the background) I put them all together so the boys don't have to look for them.  Look at that - I grow 18 food herbs in the back yard (plus that red jar which is dried strawberries that I want to test out in the boys tea - N, I think, will like that). Huh, if I had guessed, I would have said 10 to 12.  Interesting.

So, the jams are almost all used up now, but I have some berries in the freezer to turn into jam when we run out.  We are about halfway through the pickles and tomato juice.  We have hardly touched the hot sauce, but only have about 3 jars of salsa left.  It will be interesting to see what we have left when we get back around to the new garden season.  Some of the herbs I am afraid will run out - specifically the thyme and lemon thyme.  Others, I have aplenty - specifically the mint and lemon balm.  I will update again near the end of winter.

Linking up with: Creative Friday at Natural Suburbia
                         Tutorial Thursday at Marigold's Loft even though I am linking up a day late.
                         What I am eating over at Townsend House a new link up.
                         Simple Meals Friday at Nourishing Traditions  a new to me blog I am excited to have found.

Tuesday, 9 October 2012

Long weekends.

This weekend, while I was in the kitchen making some soup stock, I figured I may as well get out the dye pot at the same time.
I had this many carrot tops, times two, in my freezer hoping to get to this soon.  I have been told that carrot tops make a very reliable green so I thought I would give it a go.  According to my dyeing book, using alum for the mordant would give "chartreuse" and tin should give "deep celery green".  Deep celery green sounded lovely, so I chose to go with tin.
Carrot tops simmering in the dye pot look suspiciously like pond water.

I added the tin and stirred it all up.  No problem so far.  Then I added the cream of tartar, and that is when the whole pot turned cloudy yellow.  I was under the impression that one always has to add cream of tartar to the dye pot...maybe that is just with alum.  I have since looked it up, and it turns out that cream of tartar can be added to the tin "if desired" to soften the wool, and change the colour.  Hmmm.
This is what the colour looks like compared to the daffodil dyed yarn.  It is clearly not "deep celery green".  I currently have some walnut hulls soaking so I might give it a little dip in there after dyeing the next ball of yarn to tone down the yellow a bit.  I'll have to see what happens to the test run though.

Incidentally, I finished the fingerless gloves and have started a second pair to give as a gift.  I used a free pattern from the internet - by Bernat - but try as I might I can't find it again.  I will have to check on my printout and add it here later.  It is on their website and the pattern is "Softee Chunky - Family Convertible Gloves/Mittens".  You have to sign in to get to the patterns.
For mine, I used a bulky yarn and larger needles and then followed the kids pattern.  For the "gift pair" I am using two strands of worsted weight yarn and following the adult (men's) sizing. 

In the kitchen:  I had a pot of beef stock simmering on the stove for most of Saturday.  I bought some bones from the butcher for it.  In the past, I have pretty much stuck to chicken stock as those are the bones I usually have on hand, but I wanted to see if it really was the stock that made a difference between my french onion soup and my mom's.  It is.  I had plans to make a huge pot of soup and pressure can several jars to have on hand in the winter, but by the time I was done and we had some for dinner, I only had 3 pint jars left, so I put them in the freezer.

Here is my recipe:
Put a good size glob of butter in your pan...more than you think you will need.  For this many onions...
 ...I'm guessing about 9 or so (that is a pie plate, heaped) plus this many leeks...
...12 small ones...I probably started with about 3 or 4 tbsp of butter and 1 tbsp olive oil.  I added the leeks because I had originally bought 2 bags of onions, but used half a bag over the weekend, so I wanted to top it up.  They are from my garden so as a bonus, they will be the "eat something from the garden" ingredient for the next 3 times I eat my soup.  Little bonus there.

Saute the onions (and leeks) until they start to caramelize a bit.  When they start to stick to the bottom of the pot, add another pat of butter (1 tbsp at a time) if needed and scrape up all those nice brown bits.  Sprinkle about 3 tbsp of flour on top and stir stir stir.  It will want to stick and burn at this point.  When it is all a nice golden colour, add about 1 to 1 1/2 cups white wine and again, scrape up all those nice brown bits.  Now add your stock.  Beef stock.  I have always used chicken in the past, and trust me on this one - it makes a world of difference.  (This is the stock I spent all day Saturday simmering and then dropped a third of it on our back porch steps bringing it in from the garage).  I think I probably had about 7 cups.  Adding more would not hurt at all if you have a really good broth going.  Add a bit of tabasco (sounds weird I know, but it makes a difference) or Buffalo wing hot sauce if you ran out of tabasco (*grin*), 4 bay leaves, salt and pepper to taste and simmer for about half an hour.  Then top it up with bread/croutons of choice, cheese of choice, and broil it until it is all melty and delicious.

From the bookshelf:  I have finished reading "The Far Side of the Mountain" which follows "My Side of the Mountain" and the child in the book is always eating wild plants.  It has peaked my interest enough to check out a book about edible wild plants from the library but it isn't a very good one, so I will be going back to check out some more.  I am also reading the current issue of "Mother Earth News" a little bit at a time on my lunch break at work.  

Linking up with:  keep calm craft on at frontier dreams on Tuesday
                          yarn along at small things on Wednesday
                         the backyard farming connection
                          fiber arts friday at Wisdom begins in wonder
                          creative friday at Natural suburbia 

Saturday, 22 September 2012

Putting a twist on it.

Check out the giant wooden spoon I picked up this summer in China town when we visited my sister.

A few days ago I was making some soup for dinner.  Vegetable soup, with cheese tortellini on the side that we could each add in or leave out as we chose.  N walked in while I was making it and said "the onion soup smells delicious".  He was disappointed when I told him it wasn't actually onion soup, at which point he asked if we could still put bread and cheese on it and bake it in the oven.

Why not!  We often put a twist into our favourite recipes to make them our own...so why, indeed, had I never thought to make any other soup, french onion style?
So, the vegetable soup got ladled into bowls (3 of them with a handful of cheese tortellini in the bottom) and then covered with croutons (it's what I had on hand) and cheese and put into a hot oven to bake.

The soup was just chopped vegetables that I had in the fridge (onions, celery, carrots), some corn I had cut off a cob and put in the freezer, and the broth was cooked over a campfire this past summer.  Throw in some dried thyme and sage from the garden, a couple of bay leaves, a few drops of tabasco, some white wine, and it is actually very similar to onion soup.

Served with nice warm biscuits.  I am pretty sure these were my first ever really successful biscuits.  And yes, I am fully aware of the double starch, but sometimes, you just have to roll with it....and I was rewarded with the ever elusive "This dinner is delicious" from one of the minions.  How sweet it is.

Wednesday, 27 June 2012

Preparing for winter...in June

 I am always looking for new home remedies to try rather than buying over the counter medications filled with strange ingredients (not to mention I have strange reactions to said over the counter medications and usually can only take a 6 year old's dose of children's medicine - if even that).  Last year, I was thrilled to find out that currant juice can be used for sore throats.  I tried it and it worked like magic.  And I just happen to have currant bushes in my yard.  The problem...what do you do in the winter when the currant bushes are sleeping?  The answer - I hope...preserve the juice!
 Basically I just boiled the currants until most of the colour was gone from the berries and put them through a sieve.  Last year, I mixed the black and red currants, but this year I used only the red because I am wanting to use the black ones in a mixed berry jam.  Unfortunately, after I made the juice, I read that it is actually the black currants that are more effective for treating sore throats...I will have to wait and see what happens.
 I tried to squeeze as much juice out as possible using a cheesecloth, but I have to admit, I ran out of patience.
 Then I just poured the juice into hot sterilized jars.  The pH of berries is probably low enough that I didn't need to actually do anything further BUT if you are making currant jelly or jam, I believe you have to put the jars in a boiling water bath for 10 minutes, so I did that with the juice just to be safe.
I used small jars because really, I am hoping that the sore throats won't last that long.  You take one tablespoon at a time as often as needed (because it is, after all, just juice).  Last year, I found that it was effective much much  longer than the kids' lozenges I usually use when I am desperate.  The three jars above is the whole yield from my bushes this year.  Next year, I am hoping the bushes will yield a little more (as they will be older) and I will again mix the black berries with the red ones to go a little farther (and ...if it is actually the case that they are more effective, then I guess that is the smart thing to do).

Note: refrigerate the jars after opening...the cold helps the sore throat too.

Anyone else have a good home remedy I can try?

Linking up with Laura William's Musings for Carnival of Home Preserving
                                                                    Wildcrafting Wednesday at Mind Body and Sole

Monday, 25 June 2012

Raspberry sorbet

 A few days ago, I had decided that after the raspberries were done, I would rip most of the raspberry canes to plant something else next year.  They take up a lot of space (probably about 200 square feet) that could be used for growing veggies, and we weren't really using them up very much. 
In previous years (2009 above) I had a helper to pick them...this year, no one seems to be interested.  So I was picking them - because they are there - but I still had a bag full in the freezer from last year.
The other day, I picked just over a pound of them.  So I looked up a recipe to use them up.

Enter...Raspberry Sorbet....da da da DAAAA!

So super easy, fast, and oh my word...so so so good.
Note: even if you have to buy the raspberries...this is probably still worth it, it is just that good.
One pound fresh raspberries, rinsed...put them through a food processor until they are nice and liquidy and then put them through a sieve.
 Add 1 1/4 cups water and 6 tbsp honey.
Stir

Put in a freezer proof container with a lid on it, in the freezer for about 7 hours
 Enjoy!  The full recipe along with many others is in the cook's garden by Canadian Gardening.
I am really starting to quite like this book.  There are sections on all kinds of fruits and vegetables as the season progresses.  How to grow, harvest, and a handful of recipes for each fruit/vegetable.  I love just looking through it to kind of get ready for what is coming up next.  And, to be honest, I like that it is a Canadian book, because it isn't full of all kinds of things I just can't grow here.

Oh, and in case you were wondering...this recipe has earned the raspberry canes a reprieve.  They will be staying for a while longer yet!

I'll be linking this up with Frontier Dreams for Keep Calm Craft On because it's kinda crafty food                                        Homestead Revival's barn hop #67
                                      Wildcraft Wednesday over at Mind Body and Sole

Monday, 16 April 2012

Underestimating...

Non-fiber junkies, scroll down to the bottom...there is a recipe there for a delicious cake.

Last week on yarn along, I shared a project I was just starting...a scarf using some handspun yarn.

I seriously underestimated how much yarn I had.  For a change, I actually worked on this project until I ran out of yarn.   Yep, at 21 inches, I ran out of yarn.  Before I started, it really looked like a lot.  There were four balls of it.  Huh!  It is just barely long enough that I could sow it up into a cowl, but I have curly (read frizzy) hair, and the thought of pulling some wool over my head in the middle of a dry dry winter makes me cringe.  So, I am thinking I will either use some plain beige wool I already have and add some length to both ends, or put some button loops on there and add buttons and voila.  So once again, an almost finished project that will remain unfinished for months simply because I "rock" at making decisions!
Which brings me to my next problem.  So this (above) is the yarn I spun from the lovely roving I ordered over the internet from GreenwoodFiberworks on Etsy.  Incidentally, the picture below that I am including just for fun is the picture of her yarn spun up from the roving I ordered (it's called blue eyes).  What can I say...I am a beginner.  I will say that it is so absolutely super soft I will be ordering more for other projects.  
I still love the colours, and I ordered it to fill the request of a certain blue-eyed young child (N) who loves blue and green.  The problem is there is even less of it than there was of the brown yarn for my scarf project.  I am thinking there will not be nearly enough for the hat he wants.  So I am thinking I will use the fancy pancy yarn I bought as a treat for myself last year (an emerald green merino-silk blend) to put some stripes in the hat to make the yarn stretch.

Ok, and now for the recipe for those of you I bored to tears with my fiber talk...
This is an easy peasy one-bowl cake, and is delicious delicious delicious...and it stays moist for days (if it stays around that long).

Grease two 8" round pans.  Preheat oven to 350 degrees F.
In a bowl, mix together:
2 cups minus 2 tbsp whole wheat flour (if you use 2 cups all-purpose, it tastes even better and is even more moist, but you can actually hide whole wheat in here and it tastes pretty darn good)
2/3 cup sugar
1 tsp baking powder
1/4 tsp baking soda
pinch of salt
1 cup yogourt (I use vanilla, because it is always in my fridge)
1/3 cup vegetable oil
1 tsp vanilla
2 eggs
1/2 cup cocoa
2 eggs
2 squares melted baking chocolate.
Mix it all together until well mixed and bake for about 25 minutes.

Cool on a wire rack.

Warm 1/2 cup seedless raspberry jam until it thins out a bit.  Spread jam over the top of each of the cakes.
Stack one on top of the other, and garnish with...
whipped cream...do this at the last minute...
Note #1: If you cut a piece of this cake, and load it with whipped cream, and take your bike to work, you end up with a delicious piece of cake swimming in a pool of melty cream...just saying!  Not pretty, but still tasty.
Note #2: This cake recipe does not work for a cake you intend to fill and roll up, like a yule log...trust me on that one, but it does also work as a kind of "deep dish" cake.  Don't know what I was thinking.
Note #3: Oh, and if you follow that rule about "you can cut the fat and sugar in any recipe by 1/3 and never notice the difference"...I have already cut it in the measurements above, so I would avoid doing it again.

Your welcome.  :)

Linking up with Frontier dreams for Keep Calm Craft(ing) On and to newly found (to me anyways) 33 shades of green for Tasty Tuesday.  Won't you come join us?